
About Me

My photo
Newcastle upon Tyne, Northumberland, United Kingdom
This is a blog I use to share my papercraft projects. I make them for friends and family, as well as selling them to fund my craft stash. You can get in touch with me at loumac03@gmail.com if you have any questions or would like to place a commissioned order.
Showing posts with label Hobby House. Show all posts

Monday, 6 April 2015

Polly's Pals

Another Monday rolling in! I can't even believe we're in April!! A quarter of the way through the year already. Madness!!

The good news is, I have the week off work. The bad news is, I'll be spending most of my time at the boat. Some of you who know me will know me and the boy have taken a ridiculously large restoration job on and.. quite frankly.. I just wish I would finish itself.

Onwards.

I'm here to share some inspiration with you all using products available at 


 I have used the gorgeous little girlie from The Hobby House toppers set - Polly's Pals.

I created a Christening card with her.


I added the personalised details using a Lawn Fawn alpha stamp set. I went a little OTT with embellishments, adding buttons, crochet flowers, vellum flowers and both half pearls and liquid pearls. Love how it turned out though. The unusual colour combo is taken from the topper itself - I love how it works.

That's all from me for today. Please be sure to stop by the BLOG for daily inspiration. xo

Monday, 29 December 2014

Let it snow!

It's almost 2015!! Can you believe it? 

As a little Christmas wind down I have one last Christmas card to share with you all. This time I've used some more Hobby House toppers.

This time I used two cute snowmen from 


This cute couple have been paired up with some older Echo Park papers and a sentiment from Amy R Stamps. I added a doily behind the image panel and added a very glitzy double bow with some jingle bells and a burgundy button.

Love this! :) I hope you guys like these toppers too! xx

Monday, 15 December 2014

Silent Night, Oh Holy Night

Morning guys!

With the big day drawing ever closer, I thought I'd be the perfect opportunity to share some more Christmas goodness with you all.

I created both of these cards using the same Hobby House topper pack.


I used Dovecraft Back to Basics Modern Christmas paper pack as the browns and olives matched the rich reds and ivorys from the toppers perfectly. I always have a hard time matching papers to my toppers but this worked out perfectly! :)

I used some twill? wired twill? ribbon twill? hah! from my stash, as well as some gold organza before adding a Whimsy sentiment and some liquid pearls.

Jobs a good'n. xx

Monday, 8 September 2014

Isla Mae

Who agrees, that's a gorgeous name?! Love it!! 

I created this card using a Hobby House topper for a brand new baby girl, Isla Mae.

I haven't had as much time as I might have liked to really make head way with my Christmas cards so far this year. I know I said a couple weeks ago my blog might be Christmas-y from here on out, I lied. I've been sooo busy with commissions and other DT work that I haven't really had time. This must change! Anywho.

Isla Mae.


I was desperate to use that feather paper from Carta Bella, and this was the perfect project for it! The perfect colour pink! Yum! I teamed it up with some green plaid paper from an Echo Park pack. It's not very often that I mix and match papers from different packs, but this time it totally worked! :)

I added a whole load of the usual froofroo. Any questions, don't be shy - just leave me a comment and I'll get back to you ASAP. Thanks for stopping by. xo

Wednesday, 30 July 2014

YAY! It's your BIRTHDAY!

Morning guys! July is almost through, can you believe it?! 

It's a nip and a punch for the first of the month, what is it for the last day?! LOL!

I'm popping in to share some My Mum's Craft Shop inspiration with you all today. This weeks theme is KIDS BIRTHDAYS

Little kids birthday cards are always fun to create. There are a bunch of little kids images out there, it was hard to choose!!

In the end I went up with The Hobby House Toppers - When I Grow Up.


I LOVE her chubby little legs and the shoes she's pinched from her mam! 


I stamped a couple sentiments from Amy R - Great Birthday Greetings and die cut them with some circle dies. I added them to my card and built up my embellishments around them.

I added a couple buttons, liquid pearls, stickles and some Rhinestone Hearts to finish up this card. I'm all about the froofroo for finishing touches.

Thank you for stopping by today. Be sure to pop by the blog for daily inspiration from the awesome DT girls! xo

Saturday, 19 July 2014

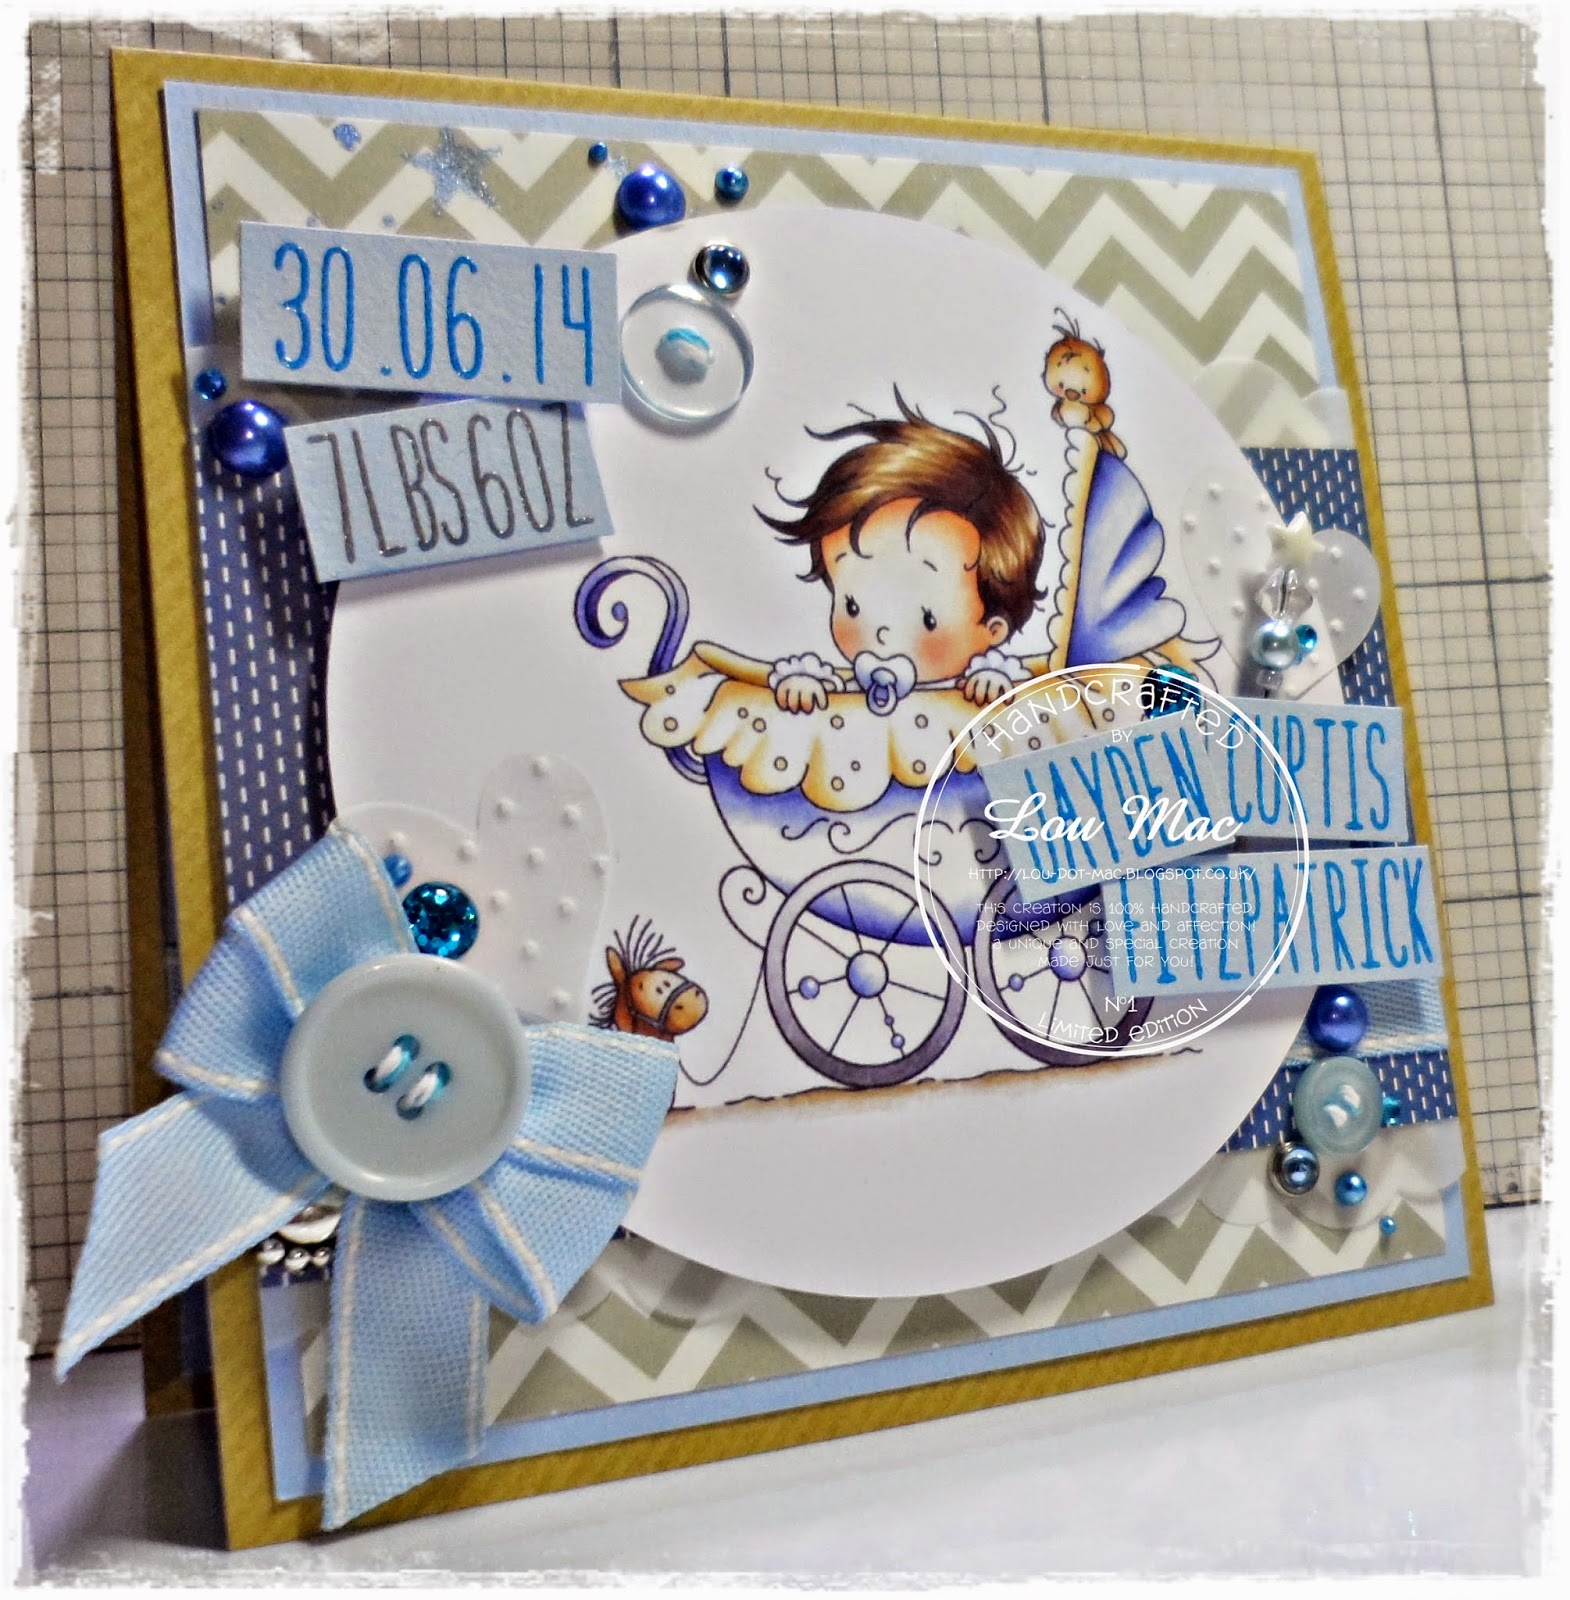
Little Baby Boy

Morning guys! :) Up and at it today. It's time to get our butts to the boat this afternoon and work, work, work. After a very expensive day yesterday (my car failed it's MOT for the 4th year in a row - the jaloppy is a total money pit) I am ready to take my anger out with the sander.


I'm quickly checking in with you all to share a recent baby card with you all. This was for a friend to give to a new mam. I used a cute topper from The Hobby House, paired up with some papers from Carta Bella and My Minds Eye. 

I added a bunch of froofroo and that was that! :) Thank you for stopping by. Enjoy your Saturday, whatever you get up to. xo

Wednesday, 9 July 2014

Berry Fairy

Morning guys! :) 

I'm back to share a project using supplies from My Mum's Craft Shop with you today! 

Some of the more keen eyed of the bunch may notice that I'm trying to trick my brain into thinking that it's Christmas. It's time to start creating for Christmas. COME ON CHRISTMAS CARDS! I just won't accept the fact that I gotta get my butt into gear and start with the Christmas froo froo just yet.. but it won't be long.

So instead of diving in head first this year, I thought I'd create an every day card with Christmas colours. 

I used a gorgeous Hobby House topper from the Rosetta set of 6. This is a little berry fairy, she's such a cutie. I matched her up with some papers from Echo Park.


I then added a sentiment from My Favorite Things Pure Innocence - I Pick You to a piece of kraft cardstock I die cut with Die-Namics Sentiment Strips 2 before adding two little red brads at either end. 

I rediscovered some lovely polka dot grosgrain ribbon in coffee which I added near the bottom of the card with a double bow. I added a little button to the knot, and stitched more of the basic round buttons to the card. I kept the colour theme consistent by adding some red sequins and liquid pearls and left it at that. Yum! :) I was definitely a little bit more ready for Christmas by the time I had finished this card! :) 

Thank you for stopping by today. xo

Tuesday, 8 July 2014

Beside the Seaside

Good moooorning guys! :) 

BRAND NEW CHALLENGE 


OH I DO LIKE TO BE BESIDE THE SEASIDE


I just *HAD* to use this adorable chap from CURLY from Pollycraft.

I printed him out pretty large with no lines and went to work with my ProMarkers. I coloured him in blue and orange to match my papers from Carta Bella. These are summery themed papers from last year, but I still have a bunch left over to use up.

I didn't really have a sentiment to match this guy, so I cut down a little element from one of the sheets of paper and bam - sentiment done. I went a little crazy with brads, sequins, buttons and such (you all know me by now) after I had stuck my little vellum clouds down. 

Be sure to head over to the Passion for ProMarkers blog and join in with our challenge this week! :) Thank you for stopping by today. xo

Wednesday, 21 May 2014

Flowers and Birthdays

Hello guys! :) 

It's time for some more weekly inspiration from me over at My Mum's Craft Shop.

You might remember THIS card I shared last week with Big Anya Styles, well this week I'm using the gorgeous


I stamped her using Angel Pink ink from Memento and coloured her using my ProMarkers and FlexMarkers.


I used some delicious papers from My Minds Eye - Record It - Here is Happy! LOVE the colours in these papers, and it pushed me to use a new combo for my pinks. Cerise, Magenta, Maroon.

I used some Lawn Fawn stamps to create a unique sentiment along side a birthday stamp from Amy R Stamps - Great Birthday Greetings.

As for embellishments, I know.. I went a little crazy. 

I also used My Favorite Things - Die-namics Rolled Daisy for some 3D embellishments and also to echo the stamp design! :) 

Thank you for stopping by today. Be sure to visit the MMCS blog each day for some delicious inspiration! xo

Tuesday, 1 April 2014

Baby Boys

Morning guys. :)

It's April.

I'll let that sink in for a second.

Yip. APRIL! A nip and a punch for the first of the month!!

The first of the month means it's time for A BRAND NEW CHALLENGE AT MY MUM'S CRAFT SHOP.

The theme this month is ANYTHING GOES! Easy peasy. :)

I just had to break out another Hobby House topper. Love these little guys! :) 


I paired him up with some older My Mind Eyes papers (had trouble matching him with stuff).. and went CRAY-ZEE with the embellishments. I added die cut stars, organza ribbon, button brads, buttons, sequins, Stickles.. you name it, it's probably on there!!

I cut the '1 today' using my Cameo. I recently discovered the offset tool and I'm in love with it. I went a little crazy and created the sentiment with three layers! Hah! :) I added the rest of the sentiment using my Lawn Fawn alpha stamps! :) 

I never thought I'd get this card completed, the purple-y hue in his baby grow totally threw me off, but with some patience, some stash shopping and the littlest sprinkling of lilac embellishments and I was happy!

Be sure to stop by the My Mum's Craft Shop BLOG and join in with your ANYTHING GOES challenge this month! xo

Wednesday, 19 March 2014

Happy Birthday, Cutie.

Hey everyone. Happy Hump Day.

It's my turn to provide some inspiration for you all using My Mum's Craft Shop goodies.

Have you guys seen the new release of TOPPERS from The Hobby House?! 

Get your butts over to MMCS now and LOOKIE! There are some real cuties.


The pinks and lime greens match perfectly with Everyday Eclectic from Echo Park, so I teamed the image up with those papers, matting stuff onto Blushing Bride from SU!

I added a sentiment using a Lawn Fawn alpha stamps, and embossed it with clear embossing powder. LOVE how that looks. :) I used a MFT Pierced Tags STAX dies to cut that out and I adhered it at a jaunty angle (that's two this week, what's wrong with me?! LOL!!).

I cut a big '1' with my Cameo from the same patterned paper pack and added it to the left hand side of the card. Then it was time for embellishing. 

I added a little pink button, and a pink gem dot, and a couple Hobby House pearl brads. Then I dug my charms out, as I haven't used any for ages. I came across this little comb from Marianne - I think - so I attached that with some pink bakers twine from Doodlebug. Some standard Liquid Pearls and Stickles and it was a good'n. 

That's all I got for ya. Happy Wednesday. Thanks for stopping by. xo

Sunday, 1 September 2013

Bikes and mud and stuff..

Yikes. It's the FIRST of SEPTEMBER 2013 already.. Christmas is upon is boys and girls.


In better news though.. the first of the month means a brand new challenge over at My Mum's Craft Shop! This month it's ALL ABOUT THE BOYS!!

I always get comments on the male cards I post on my blog, asking me how I do them?! LOL!! I think a lot of people are intimidated by them, so through out this post I'll try and share a couple tips.

TIP ONE - always use bold, masculine papers. There are tonnes of paper packs out there now that make our job as paper crafters a hell of a lot easier when it comes to boy cards. I think male cards, as opposed to boy cards, are a little different. Choosing a more mature colour palette is important. This time round I went with brown and red, with blue and yellow to accent stuff. For this card I used some delicious My Minds Eye Collectable Remarkable collection! I matted some of this onto Papermania Kraft cardstock from Docrafts. I absolutely love that deep blue patterned paper!! I have added some die cut Postage Stamp borders to the top and bottom using what's becoming a staple in my crafting from My Favorite Things


I chose a motorbike and a background from MIC for my main event, and matted it onto some deep red cardstock (Cherry Cobbler from SU!). TIP TWO - keep the embellishments structured and angular. Avoid flowers! LOL! That's a given. Unless you know they love flowers. I have layered up a bunch of squares, rectangles, pinking circles and die cut letters to create some interest in two corners of the image layer. TIP THREE - buttons. Make use of that button stash. They're the perfect 3D embellishment to create a little extra interest on a masculine card. I also added a few Hobby House Rhinestones in Jubilee Red to match the main colour from my project and to finish up the two embellishment clusters. If you don't fancy buttons or rhinestones, STARS are also another winner!

So that's it from me for today! I do hope you spare some time to join in with us this month! There is plenty of inspiration over at the My Mum's Craft Shop BLOG to help you out!! xo

Search My Blog

My Fellow Craft-o-Holic Followers

Total Pageviews