About Me

My photo
Newcastle upon Tyne, Northumberland, United Kingdom
This is a blog I use to share my papercraft projects. I make them for friends and family, as well as selling them to fund my craft stash. You can get in touch with me at loumac03@gmail.com if you have any questions or would like to place a commissioned order.
Showing posts with label WOC. Show all posts

Tuesday, 31 March 2015

Betty Rose

Good afternoon guys! Apologies for the lateness of my post.

I was at work, at stock take, at hell on earth last night. I didn't get in till late and all I wanted to do was eat and sleep! ..but I'm back in the room.

It's Tuesday, and that can only mean one thing! A new challenge over at 


Our lovely Julie has set us a challenge of

BLUE SKIES

Julie would love to see you use shades of blue on your project! Be sure to head over to the blog to make sure you're adhering to the requirements.

Here's my take on the challenge. 

I used the GORGEOUS Betty Rose from Simply Betty Stamps. I am soooo late to the party with these stamps. Each one I colour up, I'm like.. where have these been all my life? They're beauties! 


I need a lot more practice with hair, but other than that I am over the moon with how this beauty turned out! I used a mixture of blues and greys to colour up her rose dress. I went a little OTT with the paper flowers and liquid pearls, but I think I still like how it turned out! 

Up for grabs for one lucky winner is is a beautiful stamp set called Changing Birdhouse from Little Claire Designs


Be sure to stop by the BLOG and join in! Thank you for stopping by today. xo

Friday, 16 January 2015

Wheat, Dears and Dimension

Good afternoon you wonderful lot. 

Happy Friday!!

I'm popping in to share an anniversary card I created last year. This was a very special request from a lovely regular of mine. She always gives me loads of details to work with and this time it was something along the lines of, wheat stalks, deers and nature. Here's what I came up with.


Yip, that's right. I even used up some of my beloved Petal Lu flowers. I added a bunch of flowers and 'foliage' in the form of die cut leaves. I cut the little deer using my silhouette and stamped some wheat stalks (which admittedly are difficult to see in the photo) onto the kraft background and the vellum piece behind the top oval.


I kept the focus on the sentiment by stamping it in rich black and adding a black matt around the panel, but there are still loads of little details to draw your eye around the piece.

I hope everyone who had something to do with this card really enjoyed it, I know I had a blast making it! :) xx

Sunday, 5 October 2014

60th Birthday

Morning guys! I've kinda fell off the blogging wagon of late, oops! I really have no excuse, so.. let's get cracking. This morning I'm gonna share my biggest card yet. This was my first 8"x8" card that I made for a lovely lady at work. 


I created the large 60 using my trusty Cameo then added embellishments around it to suit the recipient. 

This lady always brings the most yummy cakes into work, so this little Me To You Bear with her little pinny and pile of cupcakes was perfect for the card. I added a large doily and some pretty organza ribbon.

I then raided my flower box for a couple small flowers to cluster in a couple areas. I then added some Liquid Pearls and boom, done.

I thought I'd have trouble filling such a large space. All I could think about was.. wow, people make scrapbook pages this size! Hah! Stoopid.

I hope you like what you see. Thanks for stopping by. xo

Monday, 15 September 2014

3D it LARGE!

Monday, Monday! This is my last week at work before my last week off for the year! I do suffer such a hard life! LOL!! 

I'm back with you all to share another commission with you all.

This card pushed me outside my comfort zone just a teeny weeny bit! I decided I would try and 3D the image! The photos are crap (as a result of my poooor photography skills), and it doesn't really manage to show how much dimension I managed to achieve with some fussy cutting, paper curling and a ton of silicone glue.


I used papers from My Minds Eye - bright and colourful was order of the day - I added a whole bunch of orange and pink goodness.

This design is *hopefully* going to live in a shadow box, so I made sure to really layer all of the elements up. For example, I created a double bow, added a ticket and then the age on top of the knot. I tucked in a bunch of paper flowers from Wild Orchid Crafts to the little gaps after I had stitched a few buttons to the design here and there.

I love these kinda cards, with everything going on for a few reasons. 1. I get to spend loads of time faffing (my favourite bit) 2. I get to use up a tonne of stash (which I am slowly getting better at) and 3. I *hope* it sets my cards aside from the rest, from the embellishments I choose to how I lay them out on the card.


This is definitely something I'd like to try again. It's a lot more time consuming, and for a girl who takes a good few hours to just colour a standard flat image, that's a tall order - but I love how it turned out! 

I'd love to enter this card into these challenges:
- Crafting at the Weekend - Anything Goes
- Alphabet Challenge - P for Pretty Petals
- Wags 'n Whiskers - For the Girls
Kenny K - Anything Goes

Thank you for stopping by. xo

Friday, 5 September 2014

Two Wedding Days

We're heading into September, and I could *squeal* with delight!! It's officially Autumn, so that means cooler, breezy days with atmospheric clouds and rainy sounds on the roof becoming a regular thing. Honestly. I LOVE this time of year.

Anyway, let's just calm ourselves.. and crack on with the paper goodness.


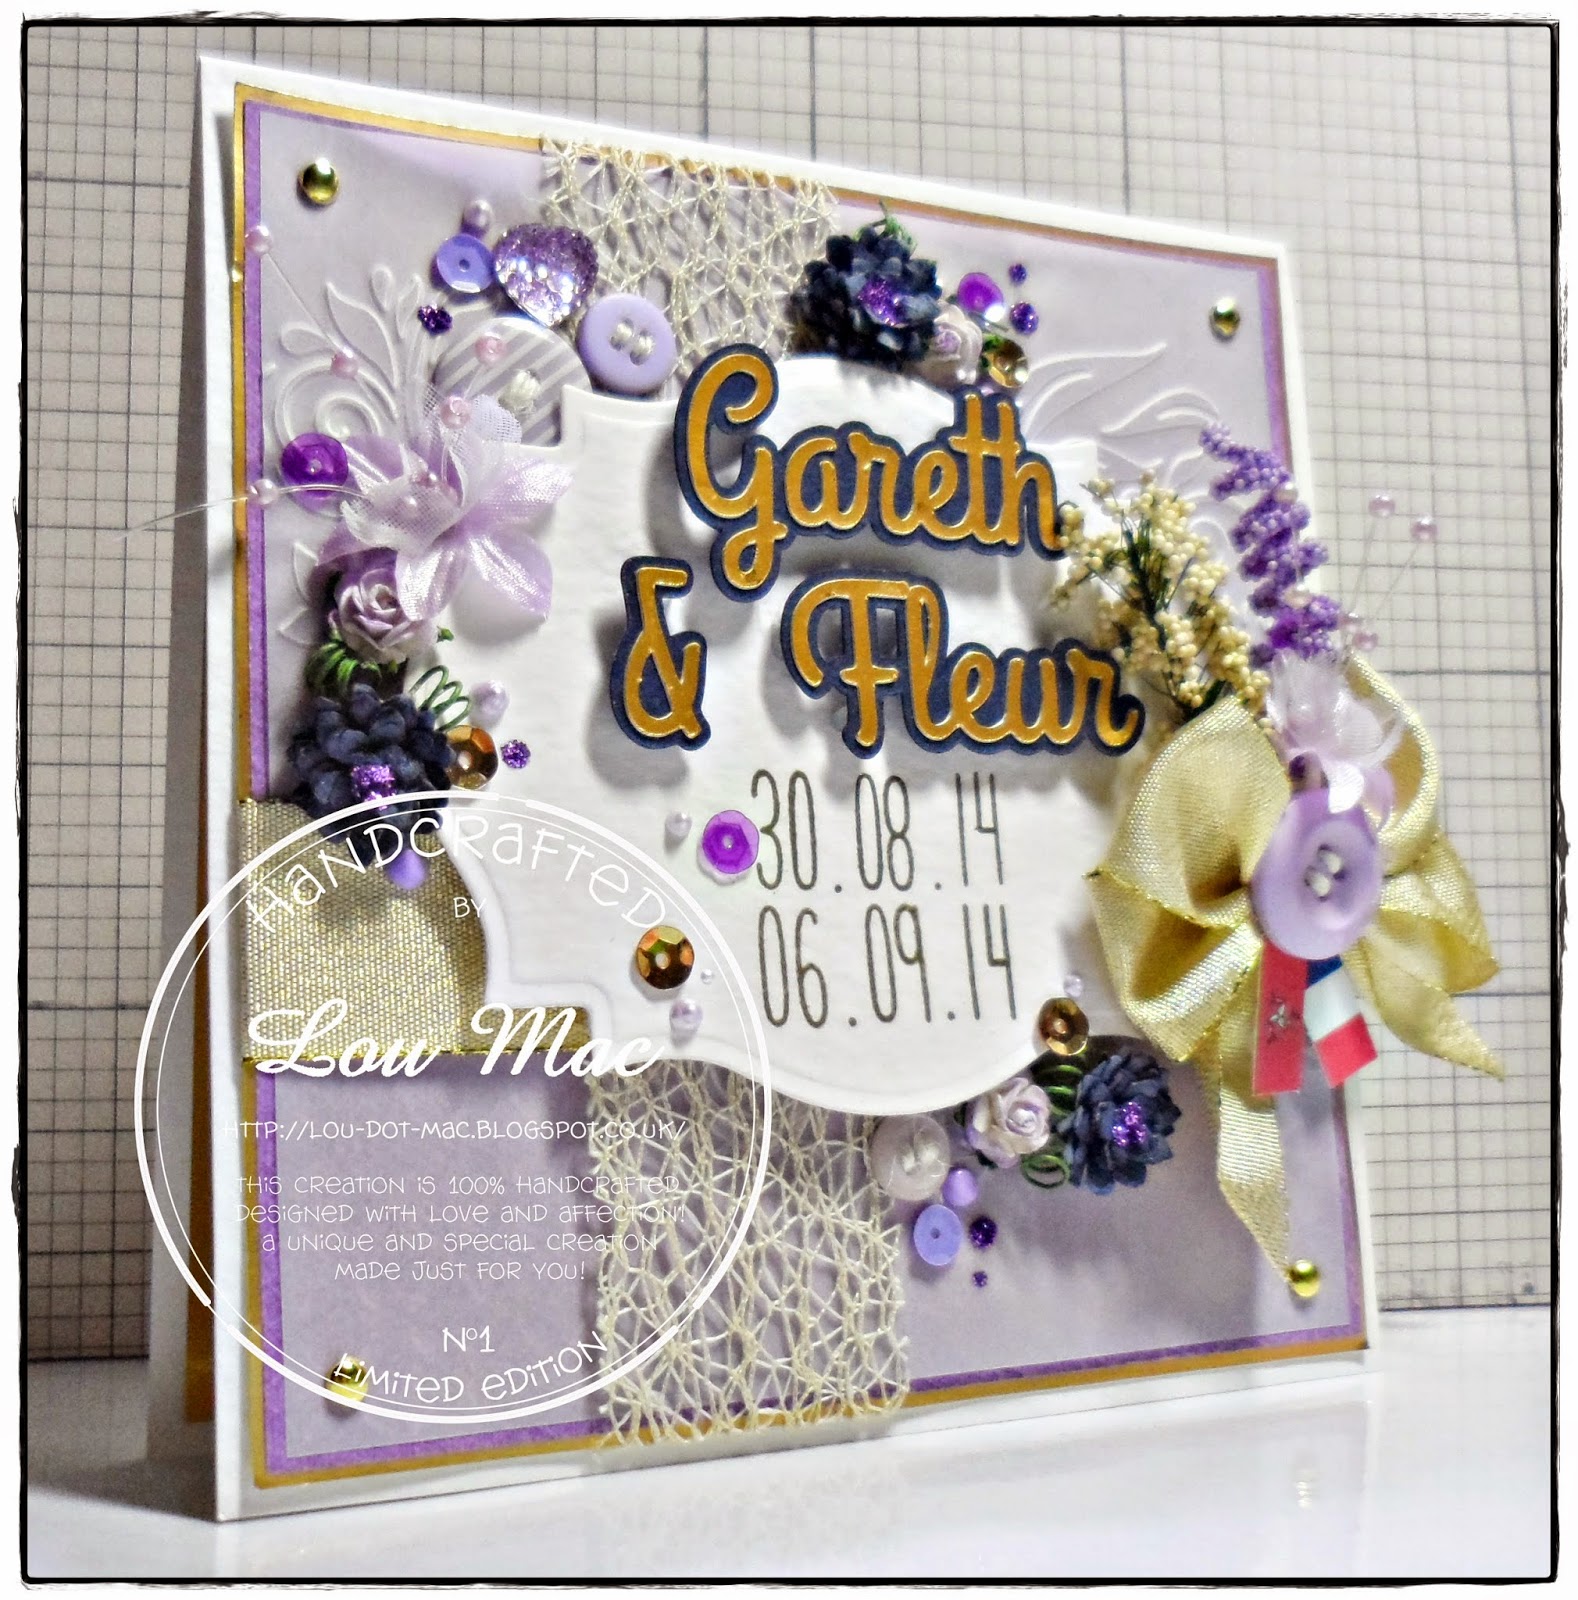
I was asked to make this super special wedding card by a lady who I met at my first ever craft fair a couple years back. She got in touch with a special request for a wedding card for two dates,the lucky couple experienced two weddings in two countries, which is also why I was asked to include the flags in the design.


I also created a box with an acetate lid to match the card and to make it more of a keepsake for the couple. The lovely lady who commissioned this card came to pick it up in person and she almost shed a tear. That meant so much to me, it's what makes the late nights and the achy back all worth it!

Thank you for stopping by today. Happy September. xo

Monday, 7 July 2014

Valentine's Tia

Today I'm back with ya to share a Some Odd Girl project (bet'cha thought it was gonna be another Tiddly Inks creation, didn't ya) that was part of an order for a lovely newbie over at my page. 


I wanted to use up some more of an older My Mind's Eye paper pack, and the colours the lady was after made this the perfect match. It let me practice my pastel colouring a little more too. Light pink, lilac with a touch of grey. Perfect.

I wanted to make sure that the sentiment stood out, so I stamped it in a dark grey onto a cream coloured patterned paper from the MME pack. I then cut each line with my trimmer and adhered them to the card using silicone glue at slightly jaunty angles. 

I added a large 2 that I cut on my cameo, a chunky twill stripe bow, some Petal Lu goodness, a bunch of Wild Orchid Craft rhinestone brads, Doodlebug brads and sequins, and some buttons from my stash.

I LOVE that little flower paper from MME. It was the last sheet I had.. and would ya looka' that!! I used it up. ;) I hope you likey. xo

Saturday, 5 July 2014

Wedding Wishes

Can't believe it's taken me so long to get around to blogging this card. It just kept getting lost (weird) in the masses of photos (which I've already accumulated on this new laptop.. another thing I said I didn't want happening *mental note* - must buy external hard drive)


I coloured them couple in black, white, blue and yellow to match my papers from My Mind's Eye.


This was a commission for a lovely lady who wanted a special card to give to her friends for their wedding. I wanted to add a lot of froo froo with it being a wedding card. So I started with the die cuts. I added a bird cage from La La Land Crafts, and an XCut heart. I then added the sentiment from Lawn Fawn and the date of the wedding.

As for the rest of the embellishments, I added a gorgeous spray of flowers from Wild Orchid Crafts, some petrol blue organza ribbon and a bunch of pearls, rhinestones, Stickles and Doodlebug brads. 

Such a pretty image, I can tell I am going to enjoy colouring these cuties up every time. 

Enjoy your Saturday, whatever you're up to. :) xx

Monday, 7 April 2014

On your first day..

Morning guys. :) 

Time to kick off the week with this very special creation.

Earlier in the year I was approached by a lovely lady with a special request. She was interested to know whether I had ever made a nursery card before. I hadn't.. but I'm always up for a challenge.


The lady wanted the image to resemble her little girl, with her pink glasses and royal blue uniform. Tiddly Inks came to the rescue with this one! :) 

I teamed the image up with some delicious My Minds Eye papers (kinda waste my time telling you what paper it is.. it is always MME!)

I added a very personalised sentiment using some Lawn Fawn alphabet stamps, and cut them into little strips using my trimmer. I then added a huge pink bow (another request) and some Wild Orchid Craft goodness.

<3 p="">

Thursday, 6 February 2014

Dina the Dino

A late one from me tonight, but I'm still aiming for a post a day this week!!

I thought I'd share another commission card from last month. This is Dina the Dino. 

Adorable!! She even has a glittery neck! Hah!!


This cutie is from.. I wanna say.. My Grafico? It's saved as zenware designs in my digi folder though, so I'm not 100%! :/ I've coloured her, or it could be a him, with my ProMarkers to match papers from Carta Bella.

I added a huge '2' using my Thickers and a smaller sentiment, 'daughter' created using my Lawn Fawn alpha stamps. I wanted to add a few more elements to this packed card, so added lime green and orange roses from WOC. a lime green polka dot ribbon and a ton of liquid pearls.

Ahh! :)

I'm now off to print me some Tiddly Inks and Some Odd Girl goodies! This is my prep for an incredibly crafty Saturday! 

Catch you all tomorrow with post FIVE of the week! Thanks for stopping by today. xo

Monday, 3 February 2014

50th Birthday Wishes

I'm starting off the week, with the aim of posting a little something each day! The photos of my creations are starting to stack back up in my projects album on my already rammed laptop, so I'm hoping to share them all with you guys so I can begin to free up a little more memory. That's the plan anyway. Sounds good in theory, right?

So I thought I'd begin with a card I made at the end of December for a lovely lady who has her birthday at two minutes past midnight on New Years Day. I know!! Beautiful timing on her Mothers part! LOL.


Everyone from work chipped in to give her some money towards her holiday - which was a birthday present from her husband.. how lovely?! So I decided to make a matching card and money wallet. This was the perfect opportunity to try out my new WRMK Envelope Board. It worked a charm.


You can create matching envelopes til your heart's content! It's super fun, and super quick.

As for the main card, this was the first time I got to try out my Cameo. I created the large numbers using a font I already had on my computer. I enlarged the letters to about 3.5" and cut them from some pretty, matching, paper. Voila.


I kept the colours pretty neutral with pops of yellow and aqua. I added a huge gold bow (using up the last of that ribbon - go me - and created a spray of flowers in the opposite corner! I had loads of fun creating this set, and everyone at work loved it too - especially the recipient. That's what it's all about, right?

Thank you for stopping by today. I'll be back tomorrow with another installment of papercrafting goodness! Until then, enjoy the rest of your Monday! :) xo

Saturday, 25 January 2014

.. with a Cherry on Top!

Happy Saturday, guys! :) This morning I've been going through the photographs of my cards and trying to make some sense of them. I have a LOT of photos and I'm getting lazy when it comes to organising them.

This year I aim to have way more blog posts than 2013, and one way I am going to achieve that is by sharing my commissioned cards with you all.

This was a card I made way back at the beginning of December. I think this is the card that started me on my Some Odd Girl obsession again! Ain't got no complains here, I freakin' LOVE Kristys stamps! 


The thing I love most about this card is all the 'white' space I've managed to achieve. Usually when I'm making larger cards I feel like I have to cover every inch with.. something. This time round I tried to cluster all of my embellishments and sentiment around the main image. I think I found this easier because I layered the image up so that part felt a lot bigger when placed on the card. 

I gotta get me some more wide organza ribbon!! Why the hell have I held off using it for so long?! It creates the most pretty bows, so puffy but without being OTT - because the organza is kinda see through. I likey. Gotta use up more of my other ribbon first though - remember, I'm tryna be good!!

So I used a bunch of SOG goodness:


I coloured Tia up with my ProMarkers to match my papers from My Minds Eye. Hmmm, a bunch of the usual goodness including Wild Orchid Crafts flowers, liquid pearls and a pop of Kraft cardstock, this time in the form of a doily, finish this piece off nicely.

I'd like to enter this card into these challenges:
- Alphabet Challenge Blog - Y - Young card for a little one
- Delicious Doodles - Must use a Ribbon
- Creative Inspirations - 249 - Ribbons
- Pattie's Creations - For the Little Girls

I always get told that people can tell it's a Lou Mac creation a mile off, and that pleases me. I feel like I have definitely found myself over the last 4 years and always try to stay true to what I think my style is. If I'm not feeling it, I don't go with it. :)

Thank you for stopping by, friends. Have a fantastic Saturday, whatever you get up to. xo

Friday, 17 January 2014

Happy Cupcake Day

Happy Friday!! Who has that Friday feeling?

I dooo! A whole weekend with the boyfriend and a trip to Ikea is on the cards, and that's just for starters! :) I hope you have exciting things planned!!

Today I thought I'd stop by to share a recent commission with you guys. This was for a lovely lady who I keep in touch with via my FB page. Not only is she a lovely customer, I can also say she is a lovely online friend, too! :)

Her request included cupcakes, purple, turquoise and pink.. and mummy.

Off to work I went.


I already knew I wanted to use Some Odd Girl products, it was just picking out which that was the hardest. In the end I went with:
- Gingerbread Kaylee (for the character)
- Baker Mae and Sweet Thinkin' Mae (for the sentiment)
- Cupcake Mae (for the giant cupcake)
- Kaylee's Closet Wardrobe (for the tiny bow in her hair)

I coloured up Kaylee and the giant cupcake with ProMarkers and FlexMarkers, but you already knew that, to match papers from an Echo Park collection called Here and Now. I LOVE those papers - so bold and bright. I matted my patterned paper onto some deep purple cardstock, I then went around the very edge with some Purple Stickles and added little dots at even intervals (gutted it hasn't showed up very well in the photos, but it's definitely something I'll be trying again!)


Here is a close up of Kaylee and her miniature bow!! This time round I tried to add a little definition to her legs in the form of.. calf lines? Goodness knows what you'd call them, but it breaks up her leg a little and I kinda like it! :) 

Enough waffle, I'd like to enter this card into these challenges:
- Some Odd Girl - Tag You're It!
- Fan-Tastic Tuesday - Pink and Patterned
- Inky Chicks - Anything Goes

That's all from me for today! Thank you so much for stopping by, and take it easy.
Have a lovely weekend, whatever you're up to. xo

Tuesday, 31 December 2013

TFT - New Years Resolutions

I know yesterdays post was gonna be my last, but I just had to squeeze this cutie in.. on New Years Eve too! :) Now I really have fulfilled a post a day. I am pretty proud of myself. 

Onwards. This is an image from the November release over at Time for Tea Designs. All of Jo's amazing images can be purchased over at her Etsy Shop

This girlie is aptly named New Years Resolutions. I totally took my inspiration from Jo when colouring up her dress. Jo is an absolute magician when it comes to ProMarker work! She holds regular Demo Days at Hobbycraft in Sheffield - oh how I wish I lived closer!!

I decided to create another easel card so I had room for a 2014 calendar on the base. This card would be good to keep out on a desk or side table to remind yourself of all the promises you made at the beginning of the year, hehe. I kept the colour scheme in blues, yellows and kraft. I used one of my faaavourite My Minds Eye paper packs which I've been holding on to for a ridiculous length of time.


I was watching.. something on Create and Craft the other night and it spurred me into thinking about my Fimo and the few molds I bought waaay back earlier in the year. I only used them a couple times, and then they got thrown in the drawer and forgotten about. Naughty me!! So, off I went to dig the stuff out.

I knew I'd be using a lot of turquoise, with it coming up to Valentines, and taking a look at the papers in my drawer I knew that it'd be a common theme, so I decided to make up a bunch of turquoise bits and pieces. Afterwards I hit eBay and bought a few more molds, mainly buttons. Can't wait to have a play with those. I also treated myself to a pack of Martha Stewart paper clay. Fun times ahead! 


So I used one clay doodad in the little sentiment/ flower cluster on the card, and another underneath the calendar. I dusted my molds with talc, and some of it stuck to the little flower design, so instead of brushing it off I put them in the oven with the hope that it'd bake into it - result! It looks so pretty.

I added a few Whimsy Stamps Tickets to the design as well as some die cut swirls (both in Kraft cardstock from Papermania) some organza ribbon (anyone know the width of that? 23mm? 25mm? - I need some more in my life. See what happens when I promise myself I'll use stuff up?! Hah!!), some Wild Orchid Craft goodness and a little clock charm. 


I was going to go crazy with buttons too, but I thought with the busy patterned paper I used in the background and the larger image panel, I thought I'd let the things I'd choose speak for themselves without adding more for the eye to take it. 

I think I've learned a lot over the last year about embellishments, their placement and having 'empty' spaces on cards for your eyes to rest. Thanks to a lot of YT and blog hopping. 

So with all this in mind I thought I'd set myself 5 Crafty New Years Resolutions
1. Experiment with my colouring.
Don't worry my little ProMarker buddies, I will continue flying the flag for us, and I hope you will too (yes, I'm talking to you Coops and Donna!!) I want to push myself to create backgrounds, groundings, more intricate clothing, more detailed hair, more shading. The whole whack!! 
Pussssssh myself.
2. Leave more love.
I don't think I've done too badly this year. I have burst of blog commenting every few weeks or so. If I haven't stopped by your blog lately and left you love, I can only apologise.. but I will be there! Soon!!
3. Be more organised in my own personal card making.
So, almost everyone who knows me knows I make my own cards now.. and if they don't receive one for their birthday or anniversary.. or Christmas.. I always feel like I've let them down. So from now on I will have a calendar up above my desk a month a head so I can see all of the cards I need to make in the next month to get sent out. 
Fingers crossed all goes well! ;)
4. Keep a better record of inspiration.
Whatever it may be that I find when browsing the web, or checking FB, or blog hopping - I always seem to.. lose. I might be under the impression that it's tucked away somewhere in the depths of my brain, but when I get sat at the craft desk.. *poof* it vanishes, and I might as well not have bothered spending 4.5 hours searching for said inspiration.
Long story short - make better use of my sticky notes and note pad. 
5. Use. It. Up.
I say this every year, but every year I get even better at it.
I've already mention in previous posts that I think I've found my *hotspots* in my craft area, so every couple months or so I plan on rotating some of my stash, like the stuff that I haven't been using very much will get moved into the areas I dip into all the time. That's the plan anyway.

Who's with me?! LOL! Thanks for stopping by today. 

Best wishes for next year, everyone. Let's hope it's the best yet! :)

Monday, 30 December 2013

2013 Favourites

.. so I tried to limit myself to 10 cards.. it didn't happen. This post has been a long while in the process, and I know that you may not want to read all of my waffle - if not, just have a flick through some of my projects, and if you do - grab a mug of your favourite liquid and join me.. I'll meet you at the end. 

****************** ************* ************** ***************** 

I realise that as the years go on (this will have been my 3rd Christmas since I started crafting in early December of 2010) - I make more and more cards each year. Whether it be commissions, personal cards, or orders placed by my friends, the number of creations seems to increase each year.

.. and that is no bad thing. It just means this post on the 31st December each year will be that bit longer. Maybe 2014 will see me a little more decisive and choose less for better reasons.

****************** ************* ************** ***************** 

Let's start.

My Favourite Cards of 2013


#1 - I think this is the first example I have of the ambition to create a 'scene' on my card. I teamed up Some Odd Girl - Renew goodness with some PaperCraft Junkie commissioned pieces and her castle! I also love the colours I used on this card - the mustard yellow dress looks lovely with the aqua flags and torrents.  


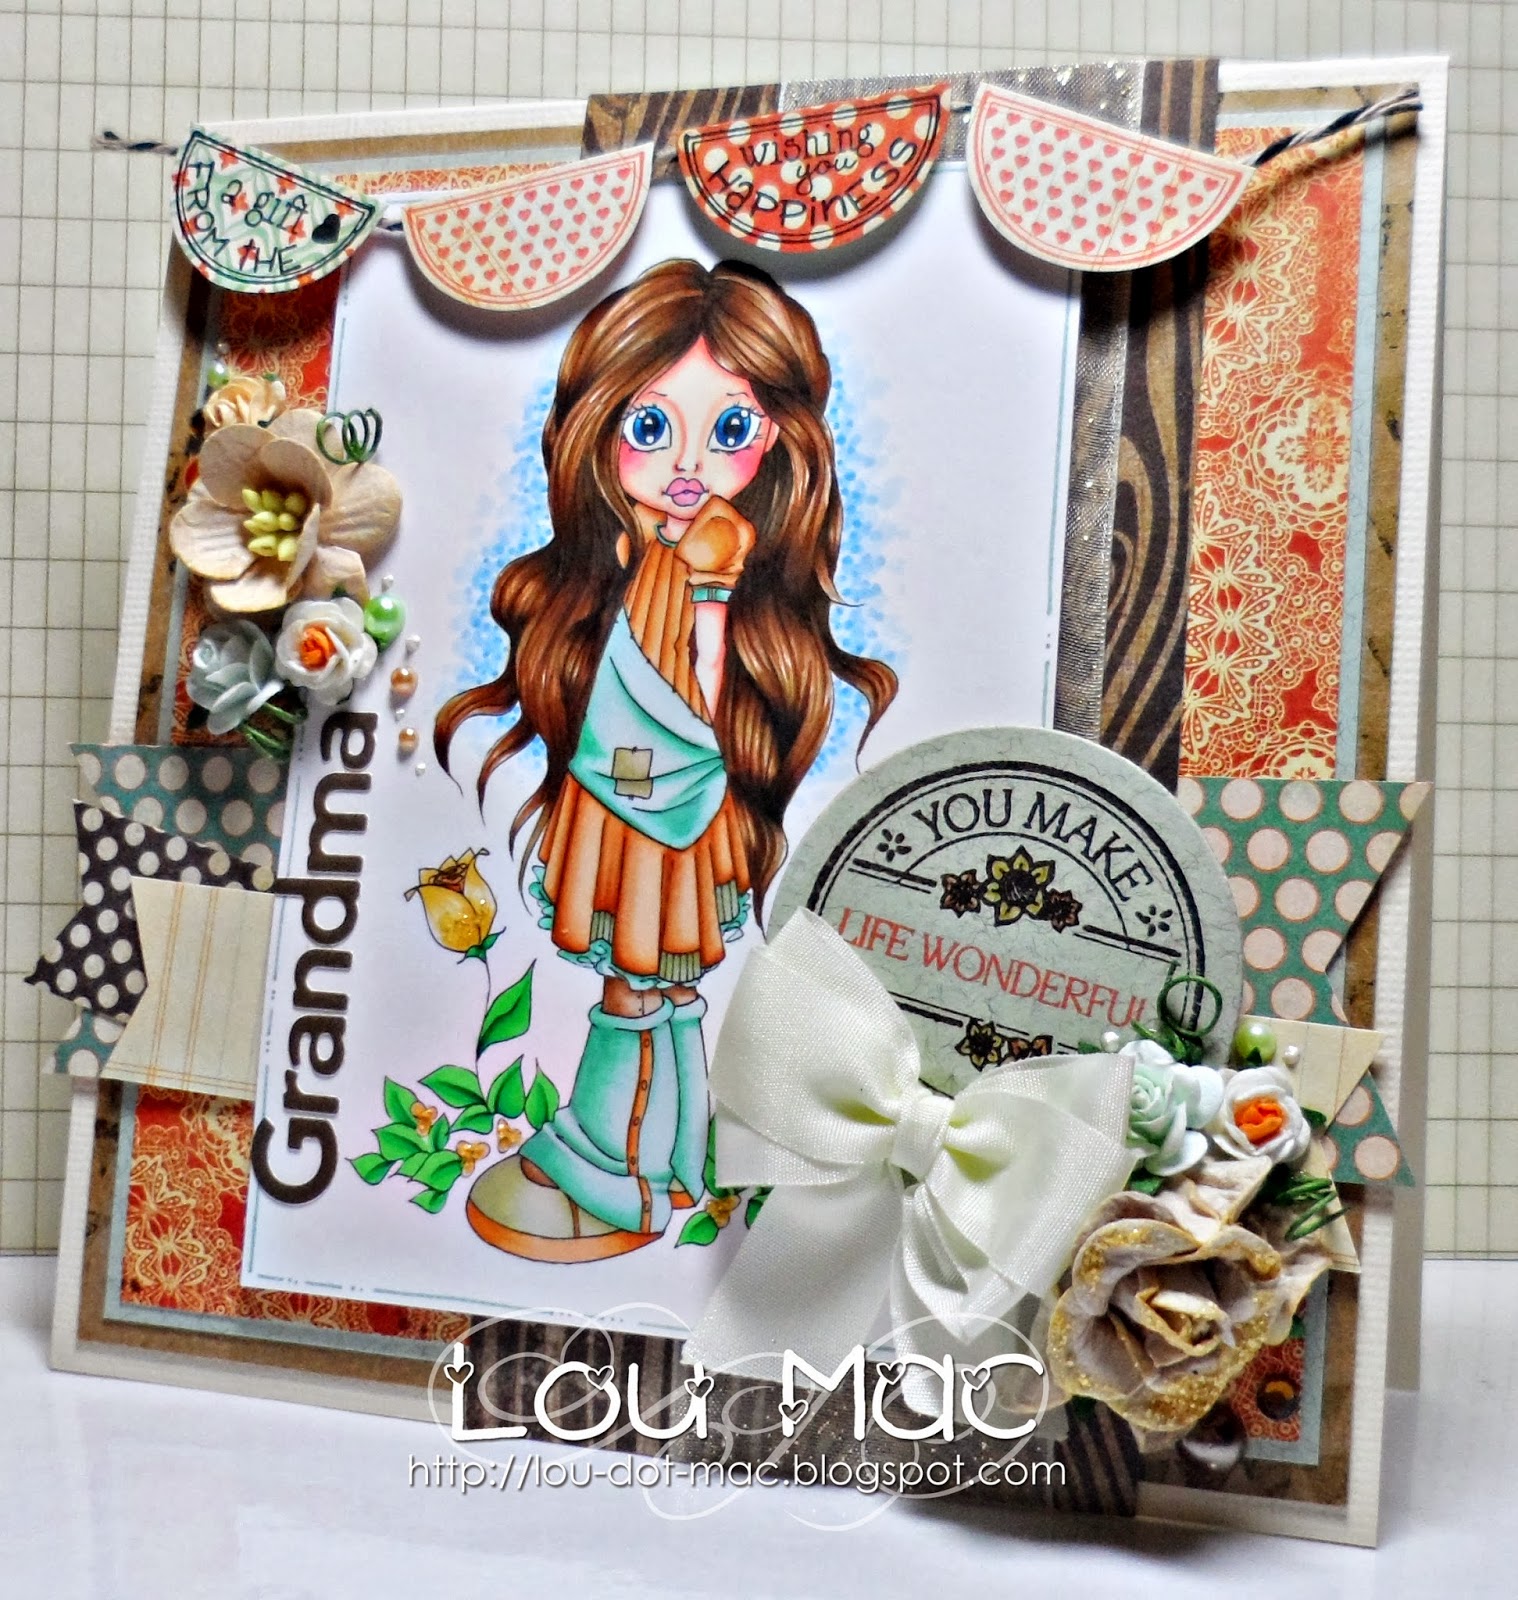
#2 - This was the last card I made for my Grandma before she passed away in hospital earlier in the year. She left it on her windowsill the entire time she was in there! :) It was a 'feel better' / 'happy Mother's day' card combined. I love this image from Saturated Canary, all of that hair is a treat to colour, and I used up some of my older My Mind's Eye paper - love that woodgrain.

This card now lives on my mirror in the living room as a happy memory. Loved the bones of that woman.


#3 - This was the first time I ever coloured up a Redonkadoodles image, and I loved it. I added a lot of detail to the area of the shoe with some little flower stamps. The Rendonkadoodles designs are so clean and a dream to colour! :) Highly recommend them. I also picked this card as it's so blingy, girly and in your face. Not my style at all, but I really pushed the boat out and gave the lady what she asked, gold glitter tape and all! :)


#4 - I LOVE creating designs like this. The base of them is just clean and graphic, then I go crazy with embellishments and fonts. I used some Bling card from Bazzill as well as a bunch of WOC goodness, Lawn Fawn alpha stamps, Thickers, The Ribbon Girl ribbon, lace and mesh.. aaaaaaaand a whole load of love. Such a clean colour combo and that diamond embossing will never get old! 


#5 - This Some Odd Girl clear stamp Fairy Magic REALLY spoke to me when I received it in the post from the lovely Kristy. I created this card when I was part of the SOG DT - and I just knew I had to colour her up with blue hair! I went C-RAZY with embellishments on this card, I think it took me over two days to lay it all out in a way I was happy. 


#6 - Where to start? Not 100% sure why I picked this as a favourite - all I know it.. I LOVED making it. I think this may well be one of the first times, if not thee first time I used a huge flower on a card. I'm not certain on the type of flower that large white one is, but it's definitely from WOC and I love it!! This Saturated Canary image is a treat - I LOVE her big hair and that gorgeous bow. The papers from Teresa Collins are too pretty - I gotta use them more next year - if I haven't sickened myself with reds after Christmas.


#7 - This was possibly the first time I posted a card on my blog with a background I had attempted with my ProMarkers. I used to use a sponge and stencil to create a clouded background, but I made a promise to myself to push my colouring a little further this year, and with this, I think I succeeded. It's a given that those clouds are looking a little - flat - it can't be helped. I was doing what I could with the experience given. None. Hah!! 


#8 - Another first on my blog.. I think this card was the first I posted where I showed my attempt at no lines colouring. This card was for my friends little girl who turned 1 earlier in the year. I love the princesses from TGF for little girls cards. :) I used papers from My Minds Eye (love) and I die cut my very own doily using an Xcut die. 


#9 - The layout of this card made me wanna die. If I didn't make OOAK cards, I think I'd just go along with this one every single time. Same die cuts, same flowers, same postage edges - everything. Given, it took me a fair few hours to lay it out how I liked, but I loved it. This card was so well received that the girl who ordered it from me asked for another similar design using different colours for another friend.


#10 - Decoupage? We'll go with that. Said I'd never really be into it. I'm into it!! This was a birthday card for one of my friends and she really loved it. I think designs like this are super impressive. I do love that little squirrel, too. 


#11 - This was another attempt at no lines colouring using an older Sugar Nellie stamp. I created this card for my nieces 18th birthday. I also created my own background with some hills and a beautiful sunset which can just be seen behind the heaps of embellishments.


#12 - Another background, this one was influenced by my boyfriend. He suggested some mountains in the background, so I ran with it. Really love how it turned out - it suits this little dragon from Tiddly Inks perfectly!! I also thought I'd best throw in a male card too. It's not that I don't enjoy making them, I really do like making male cards - it's just that the opportunity never really calls all that much!!


#13 - I've really fallen back in love with Tiddly Inks over the past few weeks - this card is no exception. I crammed so much into this card, yet made sure the image still spoke volumes. I adapted my clouded background a little to include a little more white into the design. I simply outlined the shape of my clouds with my colours for sky - simples. Ahhh, lovely, girly, detailed card.

****************** ************* ************** ***************** 

I hope I've provided sufficient links where I thought links were necessary, if there is anything you have questions about feel free to email me at loumac03@gmail.com and I'll be happy to help you out. I realise that this post has gone on for an eternity, so I'ma wrap it up around about NOW..

I gotta be honest, I only have a few observations from this year:
-My fear of 6x6" cards has been eradicated. Hallelujah. 
- I'm not as scared of pink as I used to be.
- Embellishment overload? ..and what? I do love my buttons and ribbons and liquid pearls especially.
- Matting and layering is my thing - I never thought it would be.
- I feel myself (eventually) gradually moving away from faux stitching.

****************** ************* ************** ***************** 

Hopefully.. I will continue to learn and grow throughout the next year. None of those things listed above are necessarily bad things, and I will continue to create in a way which makes me happy - above all else. Of course, that's what we craft for in the first place, right?

Thank you for sticking with me to the end. If you have any New Years celebrations planned this year - ENJOY!! .. and I'll see you all in 2014! xo
Thursday, 26 December 2013

Feeding the Robins

Happy Boxing Day, guys! 

If you've taken time out of your day to stop by here, thank you ever so much! :) 

Just a quick little post from me today to share another commissioned card with you.

Nanna and Grampy. Feeding Robins.
How cute?! 
Very!!


This is an older LOTV stamp which I've coloured up using my ProMarkers to match older papers from Basic Grey. I added a couple of Whimsy Stamps tickets, some die cut vellum snowflakes and some olive green rhinestones.

A super sweet card, perfect for Christmas.

Enjoy the rest of your Christmas festivities! xo

Tuesday, 17 December 2013

Girly, Whirly Birthday

It's a week til Christmas Eve!!

ONE WEEK!!

Judging by the speed this year has gone, this next week will go by like.. *zOoOoooooom!!*

Another non Christmas-y creation to share with you all this morning. 

This was part of a commission for my boss at work. 

Knowing this was for a little girl, I went all out with embellishments. I think I have finally conquered my fear of using pink on my creations. Infact, I think I now quite like it! Hah! Who'd have thought?!


I've coloured her up with ProMarkers to match my papers from My Minds Eye Kate and Co. Cambridge Court. I tried out some pleats and a new yellow colour combo on her little party dress. I tried to go with an ombre layered cake too, pretty happy with how it turned out.

If you remember, a few weeks ago I said that I'd be trying to making more of an effort with my backgrounds on coloured images, to take my crafting that little bit further and to make my cards look even more finished. I gotta say, it's going okay. :)

I added some simple cloud outlines and coloured the tops of them with my faded blue. I then added a heap of grass around her feet. 


As for embellishments, hah.. where to begin? 

A big organza ribbon (from The Ribbon Girl) with a little American Crafts ribbon adhered over the knot.
Some Wild Orchid Crafts 10mm roses, a MFT circle doily, a kraft doily (which is almost completely covered, but you can see a little bit poking out on the right hand side of the image), a little crochet trim (again, from The Ribbon Girl), an embossed vellum fence die cut aaaaaaaaaaaaaand of course, some liquid pearls. So pretty.

I really need to start entering my cards into some challenges, I'm getting pretty useless at this. Perhaps I can make that another new years resolution?! LOL!!

Thanks so much for stopping by today! :) xo

Friday, 13 December 2013

Happy Birthday Boss Lady

Evening guys!! Thank you for stopping by tonight.
I'ma make this a reaaaaaal quick one, as I'm a sleepy little sausage tonight.

It was my bosses birthday today, and because I know she truly appreciates and loves the cards I make, I thought I'd create something a little extra special for her.


My boss is always in her black UGG boots and I remember her telling me that she wanted a way to wear a hat in the colder weather without spending the rest of the day with hat hair.. (to which my answer was.. pretty much impossible) - so when I seen this image, I knew it'd be perfect for her birthday cad.

I coloured the image up using my ProMarkers - to which I am becoming more and more attached to with each passing day. I see many people heading over to the dark side (Copics) and I'm afraid they will never return!! Never fear, I will continue to fly the flag for the under dogs!! 

I used papers from an older Echo Park pack which I had been struggling to use, I wasn't really feeling the colours or patterns, but this time when I got it out - everything just seemed to fall together. 

Just a little FYI - you may be seeing more swirly kraft die cuts arranged underneath flowers and it's you, Donna Mosley, I have you to thank for that *hearts* - LOVE that woman's work!! I always spend waaaay longer than I actually have time for just staring at her work. I know I don't always leave a comment, but I hope she knows I appreciate what she does. :)

I think I'll wrap this up here and head back over to my bottle fo Jacques before bed time. I cannot wait for a decent enough hour to face plant that pillow of mine.

Peace. xo

Tuesday, 5 November 2013

It's Geek Time

Yipppeee, time for a new challenge over at Passion for ProMarkers.

Today, 'tis me, myself, who has came up with the challenge criteria this time round - so prepare to have me bombard your blog with comments if you decide to join in with the challenge!! ;)

IT'S GEEK TIME.

I wanna see those images you've got with glasses!! We all love a spectacled face, right? Use your imagination. I can't wait to see what you come up with. 

Naturally, with it gradually getting closer and closer to the big C, I had to use a Christmas image, right? This older stamp is from the Sugar Nellie Simply Sassy line by Krista Smith.

I'm ashamed to admit it, but this may well be the first time I've even coloured up this stamp. Very naughty!!
This is what these challenges are for though - to push your supplies, your techniques and your designs!! 

If you're after even more inspiration, be sure to stop by the Passion for ProMarkers blog where you can see what other designs the talented girls have come up with using an image with glasses, as well as checking out what prizes are up for grabs if you're a winner!!


I used some older papers from My Minds Eye. I bought them at the end of last Christmas and never got the chance to use them. Here's their moment to shine. 

I used sentiments from Whimsy Stamps and Amy R sentiments. I added a bunch of WOC goodness, some ribbon and crochet trim from The Ribbon Girl, a snowman charm and a jingle bell!! 

I'd like to enter this card into these challenges:
-
-
-

Thanks for stopping by today, be sure to stop by the challenge blog and join in with us! xo

Saturday, 26 October 2013

Exciting News! :)

If you follow me on FB, either on my personal profile or my page at Cartolinas from Lou Mac you will know that I have evetnually found out the results of my Foundation Embalming exam!! 

I PASSED!!

I was over the moon when my tutor rang me yesterday. I almost swore down the phone I was that excited, but I contained myself. Only just! ;) Heh.

So after finding out that fantastic news, sorting out my car insurance (which I was dreading due to the three points I picked up in June), making a note of a bunch of Funeral Directors to ring around on Monday, working on updating my CV and tryna sort out the rest of my stash I want to sell on Facebook.. I thought I'd take a little time out while I eat last nights congratularory left over pizza and type up this post. Hah.

*takes a breath*

This was one of the first Saturated Canary digis I ever bought, and I never even got to colour her up last year - so I made it my mission to get her onto one of my first Christmas cards of the season this year.

I won. :)

HAPPY POST THIS, NO? :D

So I always struggle with purple, and decided to challenge myself to use it, as I wanted to use up some of my older papers from Cosmo Cricket - Mittens? (not 100% sure of that) collection. So purple and green it was!!


I decided to try a different combo for what I had hopes to be brunette hair. I believe the colour I added to my standard combo of Cinnamon, Cocoa, Walnut and Umber was Burnt Sienna. As you can see, it turned into more of a red head colour - but I still loves it!! You can see my old combo for brunette hair on her little shoes, which.. colored like that remind me of cinnamon swirls. Mmm!!

I used a sentiment from an Amy R set alongside some mittens from a SU! set. I die cut my sentiment panel using a larger circle die and then a scalloped circle die from Papertrey ink - the perfect size.

I love creating these larger (for me) cards these days, as I can use more embellishments, a larger sentiment, colour a bigger image, show off more papers. It's great. I added a bunch of embellishments from The Ribbon Girl, Petal Lu and Wild Orchid Crafts. 

I'd like to enter this card into these challenges:
- Sister Act Card Challenge - Anything Goes #30
- Scrapping 4 Fun - Holidays or Christmas
- Aud Sentiments - Christmas Sentiments

Thank you for stopping by today and listen to me rabble on. I'll wrap it up now and get the rest of the stash I'm selling photographed and uploaded. xo

Wednesday, 16 October 2013

It's Free Week at MMCS

.. so I decided to take it upon myself to show you all a sneak.. of some new up and coming products to My Mum's Craft Shop!!


Kitty is absolutely spoiling us all with the new products she'll be stocking in the store, so keep your eyes peeled!! 

Today, I thought I'd show you a card using

The Greeting Farm - Anya Styles

This is one of many larger style stamps from The Greeting Farm.
So far, there are six to add to your collection
- Anya Celebrates
- Anya Strolls
- Anya Blooms
- Anya Styles
- Anya Lifts
- Anya Treats


Their larger size means they're perfect for larger cards. This card is 5.752x5.75" and she fill it's perfectly, with just enough room around the edge for sentiments and embellishments.

I've used some My Minds Eye papers, and my card has been constructed on a Kraft UK card blank.
Some Mini Doily Circle Dies from My Favorite Things as well as some Royal Leaves
and a few Wild Orchid Craft Flowers, which may or may not be getting stocked too..
I SAID NOTHING!!

That's all from me today! ;) I hope this has put a smile on your face.
Fun times ahead. xo

Search My Blog

My Fellow Craft-o-Holic Followers

Total Pageviews