About Me

My photo
Newcastle upon Tyne, Northumberland, United Kingdom
This is a blog I use to share my papercraft projects. I make them for friends and family, as well as selling them to fund my craft stash. You can get in touch with me at loumac03@gmail.com if you have any questions or would like to place a commissioned order.
Showing posts with label LLLC. Show all posts

Saturday, 5 July 2014

Wedding Wishes

Can't believe it's taken me so long to get around to blogging this card. It just kept getting lost (weird) in the masses of photos (which I've already accumulated on this new laptop.. another thing I said I didn't want happening *mental note* - must buy external hard drive)


I coloured them couple in black, white, blue and yellow to match my papers from My Mind's Eye.


This was a commission for a lovely lady who wanted a special card to give to her friends for their wedding. I wanted to add a lot of froo froo with it being a wedding card. So I started with the die cuts. I added a bird cage from La La Land Crafts, and an XCut heart. I then added the sentiment from Lawn Fawn and the date of the wedding.

As for the rest of the embellishments, I added a gorgeous spray of flowers from Wild Orchid Crafts, some petrol blue organza ribbon and a bunch of pearls, rhinestones, Stickles and Doodlebug brads. 

Such a pretty image, I can tell I am going to enjoy colouring these cuties up every time. 

Enjoy your Saturday, whatever you're up to. :) xx

Thursday, 13 March 2014

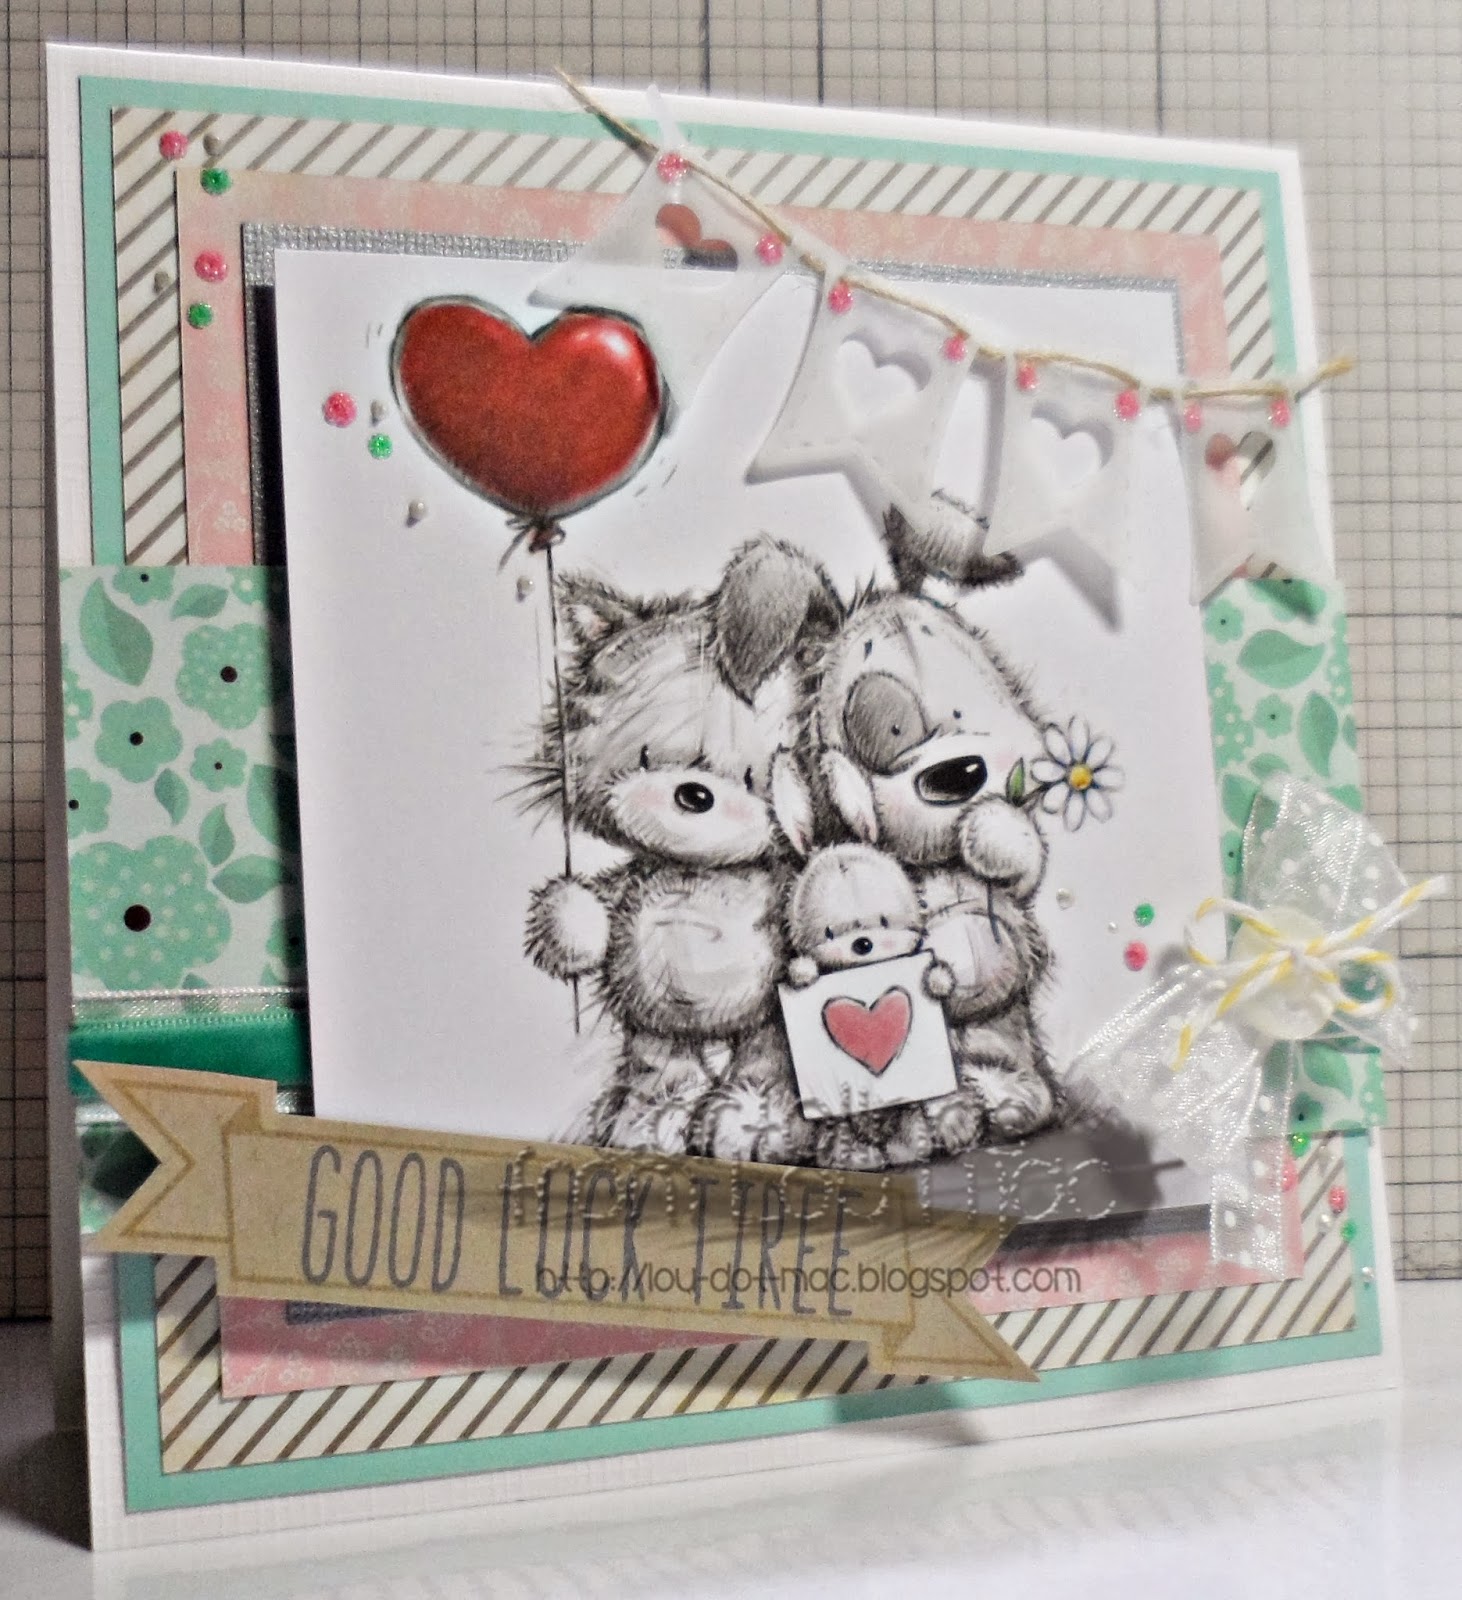
Good Luck Tiree!!

Today is a very sad day for us Home Bargainers!! 

We have one of our longest running members of staff leaving us, as she has been promoted to a new store.

I could cry.. but I'll try and keep this professional. Just know, that by the time this post goes live.. I'll probably be sobbing my little heart out. 

It's her last ever shift with us today. Boss lady give her the present and card we all grouped together for.. so I thought I'd best share it with you all.


I know I had a few people on FB asking me for inspiration when using these gorgeous Art Pads from Lili of the Valley. Here is one way. I used some delicious papers from My Minds Eye, and I stuck to pastel shades to match with the colours on the image.

I stamped a Paper Smooches banner and added a sentiment to it using some Lawn Fawn alpha stamps. A little froofroo with some organza polka dot ribbon, a button and a La La Land Crafts banner cut from vellum.

This time, it truly was what was inside the card that counted! I hear it made her cry. Haah. :)

That's all from me this afternoon. Thank you for stopping by.

I'm off to find a clean tissue now! LOL! xo

Wednesday, 5 February 2014

Oh, Happy Day

Morning friends. Happy day today, it's a FREE WEEK for us girlies over at My Mum's Craft Shop! We get to create something just because we want to with no set theme.

This week I thought I'd share Mother Goose's birthday card with you all!! It was her birthday earlier in the month. I was so tempted to include her age on this card, just to serve as a little reminder, but I knew I'd be posting it here at some point, so I wanted to save her a little embarrassment. Bless her.


So for this card I used:
and some delicious Echo Park papers


I coloured the adorable Elsie up using my ProMarkers and added a little cloudy sky in behind her. I was really pleased with how those clouds turned out - see, practice does pay off.

To create my clouds I simply sketch in a faint cloud outline then fill in my blue sky around it. I then go in with BG1, BG2 and BG3 to create some depth to the outlines of the clouds. 

The next step in my learning curve is to create clouds with poofy bits inside them, so I have shading in there too, instead of just around the outside. Watch this space! LOL!!

Thank you for stopping by today! Happy Monday. xo

Saturday, 25 January 2014

.. with a Cherry on Top!

Happy Saturday, guys! :) This morning I've been going through the photographs of my cards and trying to make some sense of them. I have a LOT of photos and I'm getting lazy when it comes to organising them.

This year I aim to have way more blog posts than 2013, and one way I am going to achieve that is by sharing my commissioned cards with you all.

This was a card I made way back at the beginning of December. I think this is the card that started me on my Some Odd Girl obsession again! Ain't got no complains here, I freakin' LOVE Kristys stamps! 


The thing I love most about this card is all the 'white' space I've managed to achieve. Usually when I'm making larger cards I feel like I have to cover every inch with.. something. This time round I tried to cluster all of my embellishments and sentiment around the main image. I think I found this easier because I layered the image up so that part felt a lot bigger when placed on the card. 

I gotta get me some more wide organza ribbon!! Why the hell have I held off using it for so long?! It creates the most pretty bows, so puffy but without being OTT - because the organza is kinda see through. I likey. Gotta use up more of my other ribbon first though - remember, I'm tryna be good!!

So I used a bunch of SOG goodness:


I coloured Tia up with my ProMarkers to match my papers from My Minds Eye. Hmmm, a bunch of the usual goodness including Wild Orchid Crafts flowers, liquid pearls and a pop of Kraft cardstock, this time in the form of a doily, finish this piece off nicely.

I'd like to enter this card into these challenges:
- Alphabet Challenge Blog - Y - Young card for a little one
- Delicious Doodles - Must use a Ribbon
- Creative Inspirations - 249 - Ribbons
- Pattie's Creations - For the Little Girls

I always get told that people can tell it's a Lou Mac creation a mile off, and that pleases me. I feel like I have definitely found myself over the last 4 years and always try to stay true to what I think my style is. If I'm not feeling it, I don't go with it. :)

Thank you for stopping by, friends. Have a fantastic Saturday, whatever you get up to. xo

Friday, 17 January 2014

Happy Cupcake Day

Happy Friday!! Who has that Friday feeling?

I dooo! A whole weekend with the boyfriend and a trip to Ikea is on the cards, and that's just for starters! :) I hope you have exciting things planned!!

Today I thought I'd stop by to share a recent commission with you guys. This was for a lovely lady who I keep in touch with via my FB page. Not only is she a lovely customer, I can also say she is a lovely online friend, too! :)

Her request included cupcakes, purple, turquoise and pink.. and mummy.

Off to work I went.


I already knew I wanted to use Some Odd Girl products, it was just picking out which that was the hardest. In the end I went with:
- Gingerbread Kaylee (for the character)
- Baker Mae and Sweet Thinkin' Mae (for the sentiment)
- Cupcake Mae (for the giant cupcake)
- Kaylee's Closet Wardrobe (for the tiny bow in her hair)

I coloured up Kaylee and the giant cupcake with ProMarkers and FlexMarkers, but you already knew that, to match papers from an Echo Park collection called Here and Now. I LOVE those papers - so bold and bright. I matted my patterned paper onto some deep purple cardstock, I then went around the very edge with some Purple Stickles and added little dots at even intervals (gutted it hasn't showed up very well in the photos, but it's definitely something I'll be trying again!)


Here is a close up of Kaylee and her miniature bow!! This time round I tried to add a little definition to her legs in the form of.. calf lines? Goodness knows what you'd call them, but it breaks up her leg a little and I kinda like it! :) 

Enough waffle, I'd like to enter this card into these challenges:
- Some Odd Girl - Tag You're It!
- Fan-Tastic Tuesday - Pink and Patterned
- Inky Chicks - Anything Goes

That's all from me for today! Thank you so much for stopping by, and take it easy.
Have a lovely weekend, whatever you're up to. xo

Monday, 30 December 2013

2013 Favourites

.. so I tried to limit myself to 10 cards.. it didn't happen. This post has been a long while in the process, and I know that you may not want to read all of my waffle - if not, just have a flick through some of my projects, and if you do - grab a mug of your favourite liquid and join me.. I'll meet you at the end. 

****************** ************* ************** ***************** 

I realise that as the years go on (this will have been my 3rd Christmas since I started crafting in early December of 2010) - I make more and more cards each year. Whether it be commissions, personal cards, or orders placed by my friends, the number of creations seems to increase each year.

.. and that is no bad thing. It just means this post on the 31st December each year will be that bit longer. Maybe 2014 will see me a little more decisive and choose less for better reasons.

****************** ************* ************** ***************** 

Let's start.

My Favourite Cards of 2013


#1 - I think this is the first example I have of the ambition to create a 'scene' on my card. I teamed up Some Odd Girl - Renew goodness with some PaperCraft Junkie commissioned pieces and her castle! I also love the colours I used on this card - the mustard yellow dress looks lovely with the aqua flags and torrents.  


#2 - This was the last card I made for my Grandma before she passed away in hospital earlier in the year. She left it on her windowsill the entire time she was in there! :) It was a 'feel better' / 'happy Mother's day' card combined. I love this image from Saturated Canary, all of that hair is a treat to colour, and I used up some of my older My Mind's Eye paper - love that woodgrain.

This card now lives on my mirror in the living room as a happy memory. Loved the bones of that woman.


#3 - This was the first time I ever coloured up a Redonkadoodles image, and I loved it. I added a lot of detail to the area of the shoe with some little flower stamps. The Rendonkadoodles designs are so clean and a dream to colour! :) Highly recommend them. I also picked this card as it's so blingy, girly and in your face. Not my style at all, but I really pushed the boat out and gave the lady what she asked, gold glitter tape and all! :)


#4 - I LOVE creating designs like this. The base of them is just clean and graphic, then I go crazy with embellishments and fonts. I used some Bling card from Bazzill as well as a bunch of WOC goodness, Lawn Fawn alpha stamps, Thickers, The Ribbon Girl ribbon, lace and mesh.. aaaaaaaand a whole load of love. Such a clean colour combo and that diamond embossing will never get old! 


#5 - This Some Odd Girl clear stamp Fairy Magic REALLY spoke to me when I received it in the post from the lovely Kristy. I created this card when I was part of the SOG DT - and I just knew I had to colour her up with blue hair! I went C-RAZY with embellishments on this card, I think it took me over two days to lay it all out in a way I was happy. 


#6 - Where to start? Not 100% sure why I picked this as a favourite - all I know it.. I LOVED making it. I think this may well be one of the first times, if not thee first time I used a huge flower on a card. I'm not certain on the type of flower that large white one is, but it's definitely from WOC and I love it!! This Saturated Canary image is a treat - I LOVE her big hair and that gorgeous bow. The papers from Teresa Collins are too pretty - I gotta use them more next year - if I haven't sickened myself with reds after Christmas.


#7 - This was possibly the first time I posted a card on my blog with a background I had attempted with my ProMarkers. I used to use a sponge and stencil to create a clouded background, but I made a promise to myself to push my colouring a little further this year, and with this, I think I succeeded. It's a given that those clouds are looking a little - flat - it can't be helped. I was doing what I could with the experience given. None. Hah!! 


#8 - Another first on my blog.. I think this card was the first I posted where I showed my attempt at no lines colouring. This card was for my friends little girl who turned 1 earlier in the year. I love the princesses from TGF for little girls cards. :) I used papers from My Minds Eye (love) and I die cut my very own doily using an Xcut die. 


#9 - The layout of this card made me wanna die. If I didn't make OOAK cards, I think I'd just go along with this one every single time. Same die cuts, same flowers, same postage edges - everything. Given, it took me a fair few hours to lay it out how I liked, but I loved it. This card was so well received that the girl who ordered it from me asked for another similar design using different colours for another friend.


#10 - Decoupage? We'll go with that. Said I'd never really be into it. I'm into it!! This was a birthday card for one of my friends and she really loved it. I think designs like this are super impressive. I do love that little squirrel, too. 


#11 - This was another attempt at no lines colouring using an older Sugar Nellie stamp. I created this card for my nieces 18th birthday. I also created my own background with some hills and a beautiful sunset which can just be seen behind the heaps of embellishments.


#12 - Another background, this one was influenced by my boyfriend. He suggested some mountains in the background, so I ran with it. Really love how it turned out - it suits this little dragon from Tiddly Inks perfectly!! I also thought I'd best throw in a male card too. It's not that I don't enjoy making them, I really do like making male cards - it's just that the opportunity never really calls all that much!!


#13 - I've really fallen back in love with Tiddly Inks over the past few weeks - this card is no exception. I crammed so much into this card, yet made sure the image still spoke volumes. I adapted my clouded background a little to include a little more white into the design. I simply outlined the shape of my clouds with my colours for sky - simples. Ahhh, lovely, girly, detailed card.

****************** ************* ************** ***************** 

I hope I've provided sufficient links where I thought links were necessary, if there is anything you have questions about feel free to email me at loumac03@gmail.com and I'll be happy to help you out. I realise that this post has gone on for an eternity, so I'ma wrap it up around about NOW..

I gotta be honest, I only have a few observations from this year:
-My fear of 6x6" cards has been eradicated. Hallelujah. 
- I'm not as scared of pink as I used to be.
- Embellishment overload? ..and what? I do love my buttons and ribbons and liquid pearls especially.
- Matting and layering is my thing - I never thought it would be.
- I feel myself (eventually) gradually moving away from faux stitching.

****************** ************* ************** ***************** 

Hopefully.. I will continue to learn and grow throughout the next year. None of those things listed above are necessarily bad things, and I will continue to create in a way which makes me happy - above all else. Of course, that's what we craft for in the first place, right?

Thank you for sticking with me to the end. If you have any New Years celebrations planned this year - ENJOY!! .. and I'll see you all in 2014! xo
Friday, 18 October 2013

Good Luck..

I made this card a while ago as part of a commission, sorta like a mini Believe card, like the one I made in this post.

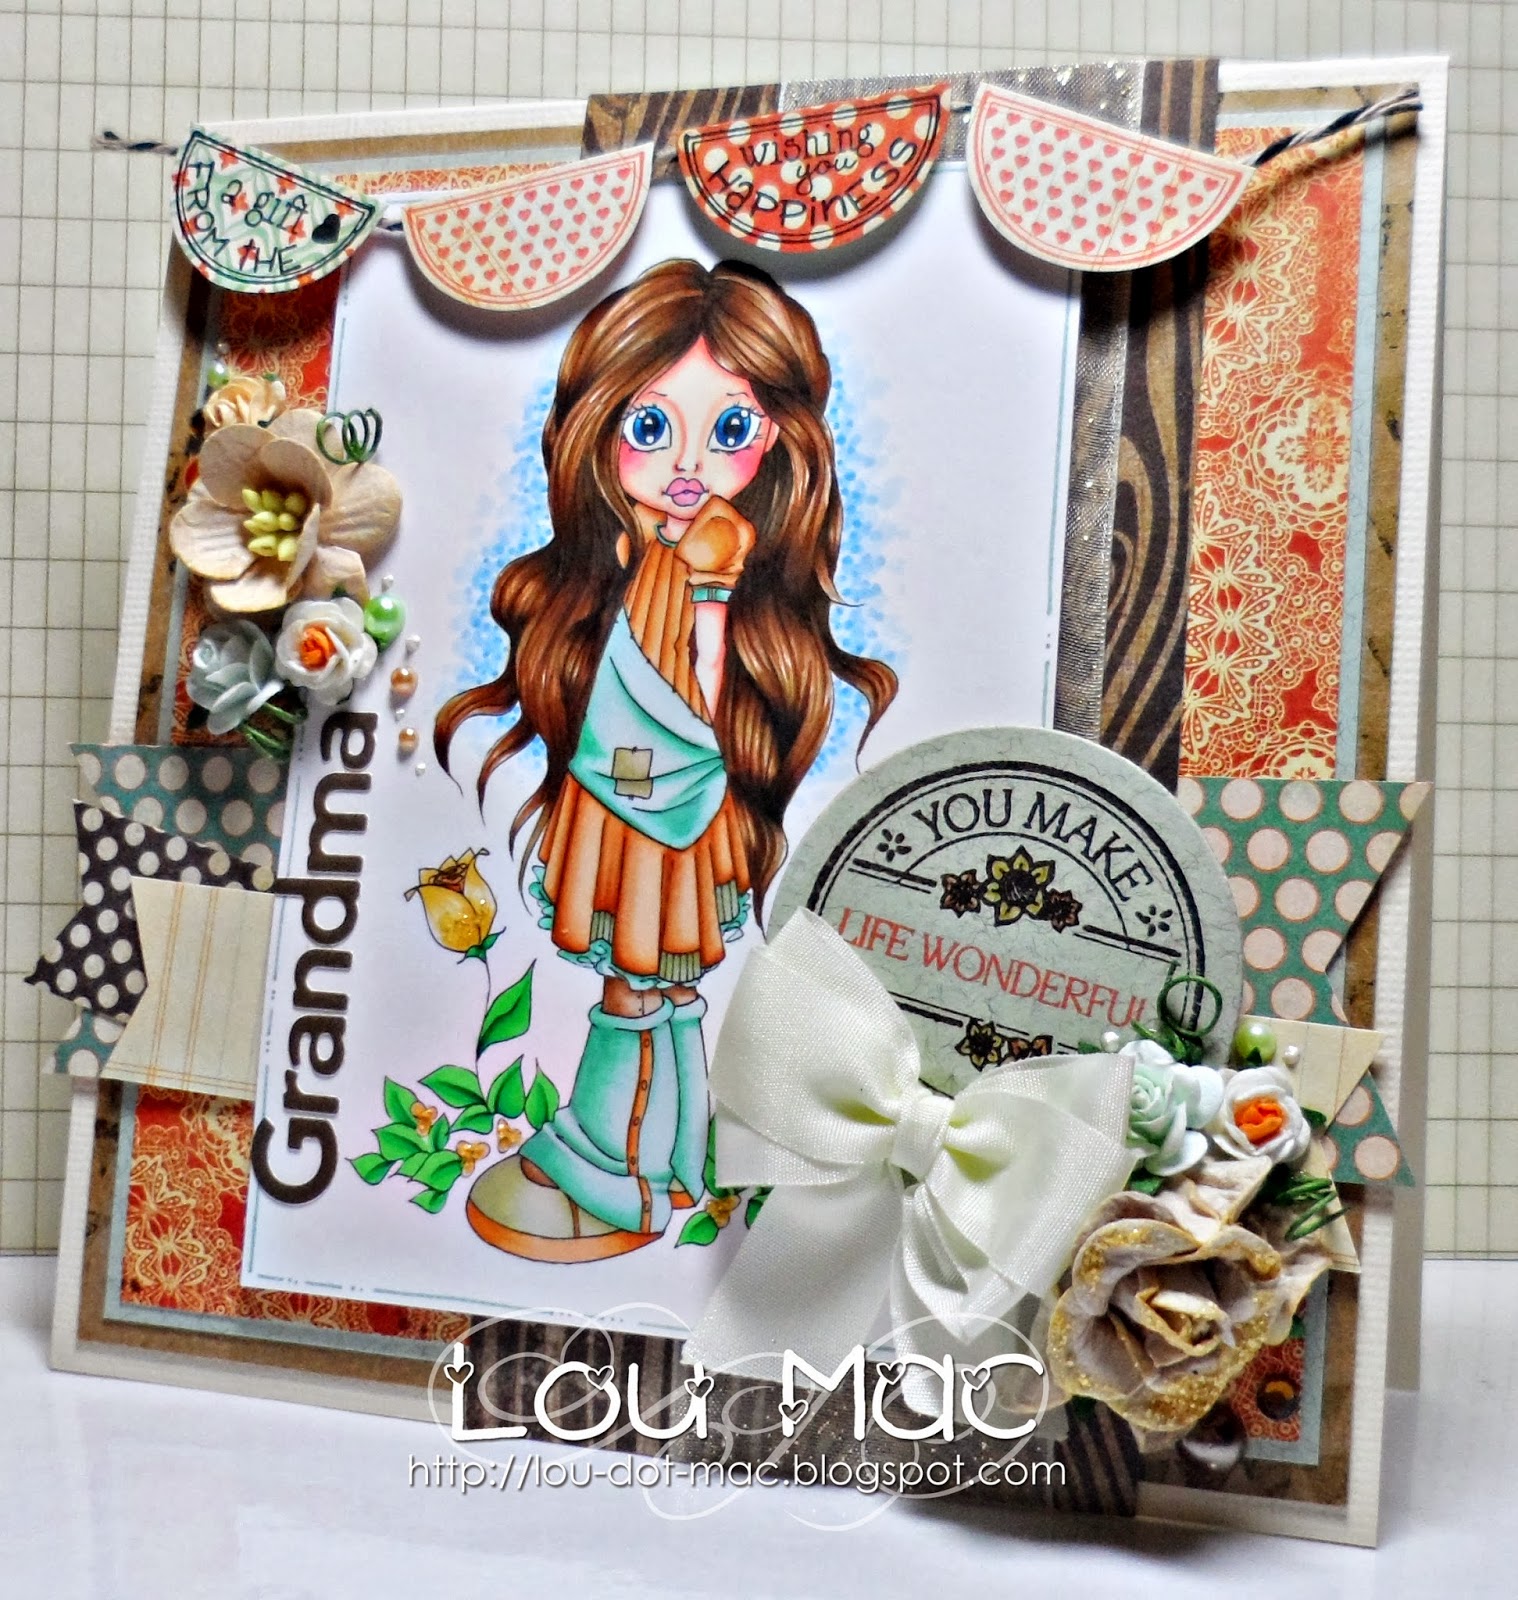
I love Fancy from Saturated Canary. I always have a blast colouring up that huge hair of hers.. and if you really take the time you can make the pleats on her dress POP!


I stuck with a simple combo of red, white and grey with a pop of blue on the sentiment banner and scalloped border. I used some buttons from my stash, a little handmade envelope charm, some gorgeous ribbon from The Ribbon Girl and the prettiest paper flower from Petal Lu.

Thanks for stopping by today. xo

Sunday, 1 September 2013

Bikes and mud and stuff..

Yikes. It's the FIRST of SEPTEMBER 2013 already.. Christmas is upon is boys and girls.


In better news though.. the first of the month means a brand new challenge over at My Mum's Craft Shop! This month it's ALL ABOUT THE BOYS!!

I always get comments on the male cards I post on my blog, asking me how I do them?! LOL!! I think a lot of people are intimidated by them, so through out this post I'll try and share a couple tips.

TIP ONE - always use bold, masculine papers. There are tonnes of paper packs out there now that make our job as paper crafters a hell of a lot easier when it comes to boy cards. I think male cards, as opposed to boy cards, are a little different. Choosing a more mature colour palette is important. This time round I went with brown and red, with blue and yellow to accent stuff. For this card I used some delicious My Minds Eye Collectable Remarkable collection! I matted some of this onto Papermania Kraft cardstock from Docrafts. I absolutely love that deep blue patterned paper!! I have added some die cut Postage Stamp borders to the top and bottom using what's becoming a staple in my crafting from My Favorite Things


I chose a motorbike and a background from MIC for my main event, and matted it onto some deep red cardstock (Cherry Cobbler from SU!). TIP TWO - keep the embellishments structured and angular. Avoid flowers! LOL! That's a given. Unless you know they love flowers. I have layered up a bunch of squares, rectangles, pinking circles and die cut letters to create some interest in two corners of the image layer. TIP THREE - buttons. Make use of that button stash. They're the perfect 3D embellishment to create a little extra interest on a masculine card. I also added a few Hobby House Rhinestones in Jubilee Red to match the main colour from my project and to finish up the two embellishment clusters. If you don't fancy buttons or rhinestones, STARS are also another winner!

So that's it from me for today! I do hope you spare some time to join in with us this month! There is plenty of inspiration over at the My Mum's Craft Shop BLOG to help you out!! xo

Wednesday, 10 July 2013

My Mum's Craft Shop Inspiration

It's my turn to fill you with some inpsiration today using products from My Mum's Craft Shop.


I had a graduate card to make, and I thought Graduation Luka from La La Land Crafts would do the job! I coloured him up using ProMarkers to match my papers from My Minds Eye Remarkable 6x6 pack.

I've stamped the sentiment which comes in the stamp set in blue ink onto a Die-namics Oval Tab Die. I kept the card pretty simple, as it's for a boy, and added a few embellishments in the form of some punched stars, liquid pearls and some buttons which I've sewn onto the card with twine.

That's all I got for ya today! Enjoy your Wednesday. xo

Monday, 20 May 2013

Dancing with Ginger!

This girl has a kinda salsa flair to her I think. She's such a treat to colour - I love that dress. Next time I'ma be brave and colour her up as a platinum blonde with a rich red dress. For now, I stuck with more pastel colours.

This is Ginger from Time for Tea Designs


I've coloured her with ProMarkers to match my papers from My Minds Eye, which I can't stop using at the moment. In case anyone is interested in the combo for her dress - Tea Rose, Dusky Rose, Antique Pink.  

I used a bunch of die cuts on the right hand side of the labels 10 spellbinder. (That was a challenge I set myself last week. I don't have many Spellbinders and I always use the same ones over and over, my labels 10 just sits unloved as it's kinda a silly shape. I used to use it all the time for home made tags). There are some Whimsy Stamps things, Xcut, Amy R Stamps and La-La Land Crafts. I stitched some buttons here and there and added some flowers from Wild Orchid Crafts. That's about it from me today.

Thanks for stopping by. xo

Search My Blog

My Fellow Craft-o-Holic Followers

Total Pageviews