About Me

My photo
Newcastle upon Tyne, Northumberland, United Kingdom
This is a blog I use to share my papercraft projects. I make them for friends and family, as well as selling them to fund my craft stash. You can get in touch with me at loumac03@gmail.com if you have any questions or would like to place a commissioned order.

Monday 29 December 2014

Let it snow!

It's almost 2015!! Can you believe it? 

As a little Christmas wind down I have one last Christmas card to share with you all. This time I've used some more Hobby House toppers.

This time I used two cute snowmen from 


This cute couple have been paired up with some older Echo Park papers and a sentiment from Amy R Stamps. I added a doily behind the image panel and added a very glitzy double bow with some jingle bells and a burgundy button.

Love this! :) I hope you guys like these toppers too! xx

Monday 15 December 2014

Silent Night, Oh Holy Night

Morning guys!

With the big day drawing ever closer, I thought I'd be the perfect opportunity to share some more Christmas goodness with you all.

I created both of these cards using the same Hobby House topper pack.


I used Dovecraft Back to Basics Modern Christmas paper pack as the browns and olives matched the rich reds and ivorys from the toppers perfectly. I always have a hard time matching papers to my toppers but this worked out perfectly! :)

I used some twill? wired twill? ribbon twill? hah! from my stash, as well as some gold organza before adding a Whimsy sentiment and some liquid pearls.

Jobs a good'n. xx

Thursday 6 November 2014

Fresh Cut Florals

I shared this card over at the My Mum's Craft Shop blog on Monday, so I thought I'd pop it on my blog too :)

WPLUS9
http://www.wplus9.com

 My Mum's Craft Shop will be stocking products from this fantastic company VERY soon!!

Here's a little project I whipped up to whet your appetite using
and the


I used a bunch of Memento, Versamagic and Stampin Up! inks to create these florals. The fantastic thing about this stamp set is the ability you have to create layers within just one flower. 

http://cdn2.bigcommerce.com/server500/b0f41/products/194/images/1487/
wplus9_freshCutFlorals3__31538.1408672644.1280.1280.png?c=2

A very fun set to sit in front of a film with. Die cut a bunch of the flowers, grab your inks and go to town with the gorgeous stamps!

Thanks for looking. xx

Wednesday 5 November 2014

Mistletoe Wishes

Good morning guys! Some more DigiStamp Boutique goodness for ya! Christmas style - of course!


I coloured this gorgeous, traditional image, using my ProMarkers and fussy cut around the frame. I added it atop a simple embossed red panel which I embellished with Liquid Pearls and some grosgrain and organza ribbon. Job done! :)

Thanks for stopping by today. xo

Tuesday 4 November 2014

Frosty Snowflakes

Snowflakes, snowflakes, snowflakes. I love me some snowflakes. I had to use two older My Favorite Things stamp sets from last year to create these two cards.


I used three colours of ink from Stampin' Up! Rich Razzleberry, Perfect Plum and Bashful Blue. They work so well together. I added a Bashful Blue matt before adhering the card front to the card base using dimensional adhesive. 

As for the sentiment I embossed it in silver onto some vellum and attached it to the card using some silver brads! Super easy card to replicate! 

Thanks for stopping by. xo

Sunday 2 November 2014

Penguin-y

November!! I know!! Where has the time gone?! 

I'm definitely feeling festive almost 24/7 now. What with Halloween gone from work and Christmas totally taking over the shelves, and glitter covering the craft room floor at home it's all snowflakes and jingle bells from here on out!

It's CHRISTMAS TIME!! I'm just waiting for the flurries of snow.

Onwards..

Apologies for the super wonky picture. I don't know what the hell happened there.. but I am still in love with this penguin from DigiStamp Boutique.


I coloured him using ProMarkers and gave him a vibrant red scarf to match my papers from a way old Basic Grey paper pack. I stamped and embossed a sentiment from Amy R stamps and cut it using an Xcut die before adding it to the card using the worlds smallest button brads!

Pretty CAS for me, but I do like making these type of cards when I have a lot on! Thanks for stopping by. xo

Saturday 1 November 2014

That Craft Place November Release

Good evening you lovely lot! I totally forgot to get my little blog post typed up last night in time to coincide with the blog post at 9am over at That Craft Place.

We have a huge new release today, and the DT have been working their butts off to bring you a whole load of gorgeousness with the new stamps. Be sure to stop by That Craft Place blog to see their creations.. This is also Boss Lady Lisa's birthday, and to celebrate she is offering 50% off at checkout.


50% off code is 
KITNCLOWDER25

Enjoy!

I created two cards, first up was SUGAR PLUM.
I love this girl! Her dress was a blast to colour up, so I thought I'd stick with the traditional reds. I created some depth on her wings with some Warm Greys and added a ton of Frosted Stickles over them. I used some yummy new Echo Park papers, some vellum die cuts and some big old satin ribbon to create a big old bow before adding an Amy R sentiment to the knot.


Next up is WAITING FOR SANTA.
I absolutely love colouring this duo! I want a reindeer onesie just like this! Again I went for traditional colours but matched them up with an older Echo Park paper pack. I added a bunch of Whimsy Tickets, a Kaisercraft sentiment and a bunch of twine and Stickles.


Be sure to get your butts over to That Craft Place Etsy Shop to pick up your
Sugar and Spice
and
Betty Boots
images! 

Thank you for stopping by! xo

Frosty Fun

This little card was part of a competition I ran on my FB page not too long ago. It was loved, and I hope the lucky winner either gifts this or displays it proudly on her windowsill or mantelpiece come the festive season. 

LOVE this little scene. 


I used a little image from a coloured pad by LOTV to create this card. I cut a stepper card template on my cameo and decorated it using a little slice of old Basic Grey paper as well as some gorgeous striped ribbon. I stamped an Amy R sentiment and adhered that near the bottom of the card.

The holly die is from Wild Rose Studios. LOVE it! Gonna spend an hour or so running that through my faithful old Bug and get a whole stash sorted! 

Thanks for stopping by! xo

Wednesday 29 October 2014

Vintage Gift Bag

I made this little gift bag a while ago, and it has been reasonably popular over on FB! 


This gift bag started life as a plain Papermania brown bag, which has been jazzed up with Bazzill patterned paper from last year as well as a couple die cuts, including a Wild Rose Studio snowflake.


I stamped and embossed a Papermania sentiment before cutting it out with a circle Spellbinders die and adding a whole string of Liquid Pearls around the outer edge.

I will definitely be decorating more of these little bags, they're perfect for Christmas gifts! :) xx

Tuesday 28 October 2014

Add Some Sparkle

Gooood morning boys and girls! :) It's Tuesday, it's almost Halloween.. and I've made ZERO cards for the occasion. I'm a nightmare. Hold onto your pants though, I do have a few Halloween images printed out - whether or not I get the chance to colour them is another thing altogether.

Halloween aside, it's time for a brand new challenge over at Passion for ProMarkers

ADD SOME SPARKLE


I wanted to give a different spin on the whole 'sparkle' thing, so I decided to make a boy card. I added a whole bunch of glitter and sequins and BOOM, it still worked. I hope you likey.

I used some yummy Echo Park papers, some C.C Designs dies, my Cameo, a Martha Stewart border punch, some wax twine, Lawn Fawn stamps and a whole bunch of other goodness like buttons and brads. I hope you likey, as I hope the birthday boy does.

Be sure to stop by the Passion for ProMarkers blog and share your sparkly creations with us! xo

Monday 27 October 2014

Donna-Marie's ProMarkers e-Book Review

Good morning guys! I'm back with a review of the e-Book as promised.

Here is a little look of the front page and contents page. 174 pages, crammed!!


174 pages of crammed in tips, tricks and info. 

All proceeds will be donated to Coffee4Craig, a homeless charity.

Donna has put a lot of time, work and effort into this e-Book, and it definitely shows.

For me, colouring images is all about using my time wisely, because of this I always stick to my old faithful colour combos and never really want to waste my time trying new combos that may or may not work. This e-Book, for me, is a blessing. 

Donna has laid out a whole bunch of combos for each colour family, skin tones and hair colour. Absolutely priceless for someone who just wants to sit and colour images and not faff about. That alone makes this e-Book totally worth it. Without giving too much away, Donna also lays out a fair few pages of beginner combos, as well as Copic comparisons - super useless for both beginners and seasoned crafters.

Aside from the combos Donna also provides a bunch of tutorials for colouring pleats, as well as a couple free digis to practice on! With photos walking you through each step and a written explanation at each step, the tutorials are very easy to follow.

Donna focuses a lot on the fine nib attachments, which I also think are an invaluable tool when colouring with ProMarkers. She makes sure to distinguish between the use of the bullet nib and the fine nib in each of her tutorials and walk throughs which makes them very usable. 

Like I mentioned before, I don't want to give too much away - but I definitely recommend this e-Book whether you be a beginner or a seasoned colourer! Head over to Donna's FB page - https://www.facebook.com/groups/157608874367734/ - or drop her a message to purchase yours today! ;)

I'll be sharing projects using colour combos from Donnas e-Book throughout various posts. xx

Sunday 26 October 2014

Christmas Greetings

Morning guys! :) I have a lot to catch up on over here on my little ol' blog. I've had a few comments over on FB about my lack of posts lately! So I'm gonna try and get the ball rolling again.

Let's kick off with another Christmas make. Here's another card using that cutie Chester from Pollycraft. This time I think he's off to post his letter to Santa! ;)


I've kept this card pretty simple and only used two pieces of paper from an older Basic Grey paper pack. I added a doily and some ribbon before stamping and embossing a greeting from Amy R before adding it to the bottom of the card and placing some vellum snowflakes here and there.

That was that.

While I'm here I wanted to share a little shoutout for Donna-Maries ProMarker e-Book!


This lady has gone to the effort of writing 174 pages of hint, tips, tricks, combos and more for every ProMarker user out there, whether you're a beginner or a seasoned crafter using alcohol pens.

You can grab yours for £12 and all proceeds go to Coffee4Craig, a homeless charity. 

I am always pretty lazy when it comes to colour combos, and I always go back to my old faithfuls. Mainly because I don't want to waste time trying out new combos - this book totally illuminates the need for that. I'll be back tomorrow with a full review of this awesome book!! 

Thanks for stopping by today. xo

Tuesday 14 October 2014

Congrats, It's a Girl!

Sorry it's been so quiet over here, again. I've been getting my Christmas on LARGE and have made over 30 cards this past week. I'm getting a little bit bored of the green and red (luckily I can throw some blue and purple into the mix) so I took a break on Saturday night to create this card for the new challenge over at Passion for ProMarkers today! 

Oh Baby!!


I used the adorable Pushchair stamp from Lili of the Valley for my card. I bought this cutie a while back, but this is the first chance I've had to get her coloured up. I need my wrists slapped! I stamped the image in Angel Pink ink from Memento. I really think this LOTV images lend themselves well to the no line colouring technique.

I wanted to keep the colouring pretty neutral with only a pop of colour (for girl or boy) on her little hat and baby grow. I wasn't 100% sure of the papers I wanted to use either (which is very unusual for me, I rarely colour an image without matching it to papers first) - although it just turned out that the pink I had chosen matched perfectly with First Edition - Bird Song papers.

That's all from me tonight! Better bury my head back into Christmas before I hit the hay! Thanks for stopping by. xx

Tuesday 7 October 2014

Mr & Mrs Bennett

I'm popping in today to share my latest wedding card with you all.

I made this for a friend of a friend. I used a cut file from the Cameo store. LOVE the intricacy of this cut! It's only tiny, at about 3.5"x3.5" as it's cut from one strip of 12" paper. 


I cut the design from cream Bazzill cardstock and layered some black textured cardstock onto some gold mirri before tucking it under the intricate design. I then created a black wrap to keep the card shut, and embellished it with some gold ribbon and some gorgeous Petal Lu flowers.


I created a small box to give it in and used more of the gold ribbon from the wrap around to create a little bow to keep the box base and lid together. Job done.

Monday 6 October 2014

Musings

Mornnninnng! 

Today I'm sharing my latest notebook design with you all. I created this notebook for one of my wonderful customers. The lady wanted a place to leave her thoughts and musings! 

I used an adorable digi stamp from Some Odd Girl! 


The lady wanted a muted colour scheme, with pinks and creams. So I kept the focus on the pretty patterned papers from My Minds Eye and the image which I coloured with ProMarkers. 

I created the sentiment using Milo's ABCs from Lawn Fawn and added it on top of a die cut heart. I addeda couple more die cut hearts to the design, stitched some buttons and added breads, pearls and sequins to finish everything off.

I know I always say I'm not a fan of pink, but every project I create using pink.. I lean towards it more and more. Still not my favourite though! xx

Sunday 5 October 2014

60th Birthday

Morning guys! I've kinda fell off the blogging wagon of late, oops! I really have no excuse, so.. let's get cracking. This morning I'm gonna share my biggest card yet. This was my first 8"x8" card that I made for a lovely lady at work. 


I created the large 60 using my trusty Cameo then added embellishments around it to suit the recipient. 

This lady always brings the most yummy cakes into work, so this little Me To You Bear with her little pinny and pile of cupcakes was perfect for the card. I added a large doily and some pretty organza ribbon.

I then raided my flower box for a couple small flowers to cluster in a couple areas. I then added some Liquid Pearls and boom, done.

I thought I'd have trouble filling such a large space. All I could think about was.. wow, people make scrapbook pages this size! Hah! Stoopid.

I hope you like what you see. Thanks for stopping by. xo

Tuesday 30 September 2014

Warmest Winter Wishes

Morning guys! :)

It's time for a new challenge over at Passion for ProMarkers.

This week we wanna see your feminine makes! 

MAKE IT FEMININE

I wanted to go against the grain a little, so I opted out of pink and frilly. Instead I went with blue and texture. I hear ya, I hear ya! ..but I took some inspiration from a gorgeous photo I came across while scouring Pinterest! 

Glamorous Hollywood style tufted headboard against floral and branch wall covering.
http://www.pinterest.com/pin/474918723177846146/

I loved the colours and the texture in this photo. So I used this as my starting point to create this card. I wanted to create a winter card, so I used the gorgeous Super Cute Hat from Time for Tea Designs.

I really wanted to practice my hair, as I feel like I've let it slip after concentrating on folds and creases for so long, so this was the perfect image for that. This took me almost three hours to colour up - good job I wasn't in a race.


I added an embossed panel to a kraft mat before layering a doily and my image on top. I then added a strip of snowflake paper from LOTV and edged it with some loopy trim. I then dug out some die cut vellum snowflakes and attached them by stitching white buttons over the top.

I added my sentiment from Amy R Stamps before looping some white cord around and around and tucking it under the image panel. I adhered it with glue dots and kept fiddling until I like how it looks. I really like how that turned out - I'm glad I've now found a use for all the colours of cord I seem to have sitting in my stash that go unloved! 

To finish the card off I added a sprinkling of Doodlebug sequins here and there to match the doily which I also sprayed silver with my Fireworks (although you can't really tell from the photo, it's super shiny IRL).

That was that! I hope I've inspired you to think a little more outside the box with this challenge. 

Be sure to stop by the Passion for ProMarkers blog to see what other amazing girls have come up with! xo

Thursday 25 September 2014

Make it Mini

Morning you lovely lot! 

Today marks my last make for the month of September as guest designer over at Little Miss Muffet Stamps! *sad face* *pet lip*

We have an awesome challenge for ya to join in with though.

MAKE IT MINI

We wanna see, ATCs, tiny little images, small boxes, anything your heart desires!


I just had to make a little keyring. These 'create your own' keyrings came into work a while ago now, and I picked up a couple.. because I could. With absolutely no idea what I was gonna do with them.

You know when things just click into place? ;)


I made her quite large and cropped her to size before I printed her out. I coloured her up using some of my fave colours - it's always fun to colour when you don't have any patterned papers to match! ;)

Thanks for stopping by today. It has been a blast creating weekly inspiration for you guys using Little Miss Muffet Stamps goodness! I hope you have enjoy my projects as much as me. Mwah! xo

Wednesday 24 September 2014

Your future is bright.

Hello guys! Why do weeks off work zoom by at super sonic speed?! Meeehhh!! That phrase.. time flies when you're having fun! It most certainly does.

Today I'm popping in to share some INSPIRATION with you all using products you can pick up at My Mum's Craft Shop

I spotted a card over on.. I wanna say Pinterest, but I'm not totally sure. I wish I had a link to give ya as it was a total inspiration, but.. I don't.


I started off with some Distress Ink in Tumbled Glass and Mustard Seed. I used some watercolour paper and created a little background with the DI and a tonne of water. I masked the edges of the watercolour paper with some washi tape to create a little white border.

I then stamped a sentiment from My Favorite Things - Watts Up? stamp set in Versafine Onyx Black ink. 

I then went to town building up my little lightbulb using the Die-namics Lightbulb die! I created a white base, and added another vellum layer which I used to inlay the little heart design in the centre. Very cute.

Before adhering everything down, as a last finishing touch I took some more Mustard Seed DI and some various circles from My Favorite Things - Bokeh Builder and added them in a diagonal pattern down the watercolour panel.

I adhered everything to an orange matt (I desperately need some rolls of foam adhesive, that watercolour paper refused to lay flat).. and then added it to my card base. Oh, and I chucked some Doodlebug sequins onto the design too.

I really love how this card turned out. It's always good to get out of your comfort zone every now and again! Be sure to to stop by the blog for daily inspiration and the website is regularly updated with new products. xo

Tuesday 23 September 2014

Christmas Frosting

Good morning you lovely lot! I finished up this little card in the early hours of the morning this morning (a lot of mornings in that sentence), when I couldn't get back to sleep after the boy had left for work!!

It was still dark outside my window and everything felt totally winter-y. Loved it.

I went for a bunch of red and black for this card. I absolutely LOVE Kelly's style, and I think these images lend themselves well to something a little different. 

This is Sugar Frosted. You can buy all of these images from That Craft Place Etsy Shop


I started off with some Echo Park paper from last year and added some white frantage in a diagonal pattern across the red patterned paper. I then cut a strip of the bauble paper and added a scalloped border along with a strip of grosgrain ribbon.

I added a sentiment from Amy R stamps, a couple vellum snowflakes, a bunch of sequins and that was job done.

I always have a blast colouring these cuties up! Grab yours HERE today! xx

Friday 19 September 2014

Sugars Doggies

Yippeeee!! Fridaaaay!! My last shift at work for an entire 9 days. Wherever you are in the world you will probably hear me squeal with delight at the end of my shift.

Today I am sharing a very special image with you guys! 


A design brought to you by That Craft Place!

50% of all profits will be making their way to Manchester Dogs Home! I couldn't think of a more worthy cause. Plus, the digi is adorable too! :)


I coloured this cutie up to match my papers from a way old Basic Grey pack called Max and Whiskers. I really do love the orange and teal combo! 

I added an Amy R sentiment, some Papermania and Prima paper flowers, a bunch of buttons, twine, velvet trim, lace trim and some liquid pearls. I think that busy patterned paper talks for itself, but I felt like going all out with the embellishments.. when don't I?! Hah!!

Be sure to stop by and pick up your image HERE! You know it'll be worth it. Oh, and be sure to share it on your blog and with us over at FB! Get the word spread! xo

Thursday 18 September 2014

Sweet Chester!

Good morning you lovely lot! It's Thursday, so that can only mean one thing.

Inspiration Thursday for Little Miss Muffet Stamps.  


I used the adorable Sweet Chester to adorn a little treat bag I created using my Cameo! I thought he'd be perfect for a whole big bag of candy canes! I coloured him in traditional colours, with a green sweater - which I added to with some green brads through the vellum snowflakes.

Cutie patooti!!

Thanks for stopping by today guys.

Wednesday 17 September 2014

Sunshine and Rainbows

Yooohoo! Happy Hump Day!!

I created this card for My Mum's Craft Shop.

I used Paper Smooches - Spectrum for the entire card.


I stamped and coloured on Neenah cardstock, added a yellow mat, and bam. Done.

I hope you like this CAS card. Be sure to stop by the My Mum's Craft Shop Blog for DAILY inspiration! :) xx

Tuesday 16 September 2014

Gift of the season

Morning guys! 

I've been spending the weekend getting my Christmas on, and this was one of my makes using a gorgeous new Tiddly Inks Fairy! I think I have eventually, gently, gradually started the ball rolling! I managed to get a couple more images coloured up, so I'm hoping to get those made up into cards over the coming weekend too.

So this card is for the new challenge over at Passion for ProMarkers

This week the challenge is MAKE IT DIGITAL

We wanna see you use your digital products! Digi images, digi papers - whip it all up together and show us what you got!! Here's what I came up with using Willow The Greeting Fairy from Tiddly Inks.


I cut the case base and the layers on my Cameo and using both Bazzill papers and cardstock. I added a sentiment from Amy R which I stamped and embossed using Love Letter Memento Luxe. As a final touch I added some Xcut vellum snowflakes with some rhinestones and liquid pearls. Boom! 

Thanks for stopping by today guys. Be sure to stop by the blog to check out the DTs awesome makes and the prizes up for grabs for the lucky winner. xo

Monday 15 September 2014

3D it LARGE!

Monday, Monday! This is my last week at work before my last week off for the year! I do suffer such a hard life! LOL!! 

I'm back with you all to share another commission with you all.

This card pushed me outside my comfort zone just a teeny weeny bit! I decided I would try and 3D the image! The photos are crap (as a result of my poooor photography skills), and it doesn't really manage to show how much dimension I managed to achieve with some fussy cutting, paper curling and a ton of silicone glue.


I used papers from My Minds Eye - bright and colourful was order of the day - I added a whole bunch of orange and pink goodness.

This design is *hopefully* going to live in a shadow box, so I made sure to really layer all of the elements up. For example, I created a double bow, added a ticket and then the age on top of the knot. I tucked in a bunch of paper flowers from Wild Orchid Crafts to the little gaps after I had stitched a few buttons to the design here and there.

I love these kinda cards, with everything going on for a few reasons. 1. I get to spend loads of time faffing (my favourite bit) 2. I get to use up a tonne of stash (which I am slowly getting better at) and 3. I *hope* it sets my cards aside from the rest, from the embellishments I choose to how I lay them out on the card.


This is definitely something I'd like to try again. It's a lot more time consuming, and for a girl who takes a good few hours to just colour a standard flat image, that's a tall order - but I love how it turned out! 

I'd love to enter this card into these challenges:
- Crafting at the Weekend - Anything Goes
- Alphabet Challenge - P for Pretty Petals
- Wags 'n Whiskers - For the Girls
Kenny K - Anything Goes

Thank you for stopping by. xo

Sunday 14 September 2014

1st Birthday

Sunday, Sunday! *love*

Sundays are usually always set aside for crafting time. In between house work and getting ready for my week ahead at work of course (boring ironing). So I can't wait to get stuck in this afternoon.

Today I'll be working on a wedding card with a truck load of purple pearls, some eye candy for Little Miss Muffet Stamps and some of the new images released from That Craft Place. My replacement ProMarkers eventually arrived yesterday. Yipppeeee!!

This morning I'm sharing another commission with you guys. This time it was for a little boys 1st birthday! I went a little OTT with the embellishments on this card, for it being male themed and all. I still kinda like it.


I used some baby papers from Echo Park, as the lovely who ordered this card had requested these colours after seeing a notebook I had previously made with them. I added some Rock Candy Stickles to the 1 and 'Oliver' both of which I cut on the Cameo before leaving to dry and adding a few buttons and the usual froofroo. 

Off to tidy my bedroom/craft desk before I get stuck back in again! I always gotta start with a blank canvas. xo

Saturday 13 September 2014

Little Pixie

Evening guys! 

After a jam packed day with the boyo, I've eventually sat on my butt for long enough to get a friendship bracelet started (a design I pinned over at Pinterest a couple days ago) and this blog post finished! Yaaaay. 

This is one of my lastest commissions from a lovely lady who ordered a whole bunch of cards in one go. I loved packing them all up with the pretty tissue paper and washi tape, the size of the parcels was hilarious. The lady at the Post Office wasn't a fan of me once I'd finished.. but that's neither here nor there.

This is the gorgeous Dandelion Fairy from Some Odd Girl, although a few girls over on my FB page have referred to her as a pixie, I think I like that!


I coloured her using bold, bright colours to match my papers from Echo Park, then went crazy adding a whole load of embellishment, including ribbon, buttons, paper flowers, beads and liquid pearls!! I cut an 8 on my Cameo, added part of the sentiment to a Paper Smooches banner and the rest of the sentiment down the right hand side of the design.

I hope the little girl loves this sweet, colourful pixie as much as I do! :) 

I'm off to add more knots to my bracelet before my eyes give up on me. Nighty, night guys. xo

Thursday 11 September 2014

Christmas Letters

Morning guys! Happy Thursday.

It's time for a new challenge over at Little Miss Muffet Stamps, and we have the best theme ever for ya! Anything Goes! :)

This little cutie has been coloured up since the beginning of August, and she has sat patiently waiting. I used a digi for my card, but this beauty is available in red rubber HERE.


I coloured her up in pretty neutral blues and beige and BAM with the red post box. This is just a lickle 5" card, so it didn't leave a lot of room for froofroo, although I still managed to squeeze some on.

I added a sentiment from Amy R Stamps which I embossed and cut using and Xcut die before adding it to my card with brads. The gorgeous organza ribbon and jewel button are from The Ribbon Girl, and I finished the design off with some vellum snowflakes and little red rhinestones.


Here's a close up of this cutie! I love her outfit. 

Thanks for stopping by today! xo

Wednesday 10 September 2014

You brighten my day!

Morning world! :) 

Another Inspiration Wednesday from me for you from My Mum's Craft Shop

Just like yesterdays card, I kept this one pretty simple. Only this time, I added some patterned paper! 


Super simple card, but so cute! LOVE.

Thanks for stopping by today. Be sure to stop by the My Mum's Craft Shop blog daily for loads of inspiration! xo

Tuesday 9 September 2014

Game On!

Remember the Clearly Besotted sale that was happening a while ago? Yeah.

I bought some sale stuff, and some other stuff.. and just generally went a little crazy with a huge order.

Within that order I picked up the set I used to create this card! 


I thoroughly enjoyed making this card. Cardstock, stamps, ink and embossing powder. Oh, and a few sequins thrown in because.. I can.

I stamped the card base with the headphones from the set in MFT Grout Gray before adding a few Bokeh Builder dots from MFT in Blue Raspberry ink, also a MFT Hybrid ink.

I then stamped and white embossed areas of the games controller onto some black cardstock which I had cut into three equal squares. I adhered these to the card using dimensonals. Added the cardfront to an aqua matt and added the entire design to the front of the card base using more dimensionals.

As a final touch I stamped a sentiment using a Lawn Fawn ABC set in Onyx Black Versafine ink and sprinkled some black Doodlebug sequins in a pleasing pattern.

That's all I got for ya! LOVE this card. I gotta make more like this and really start using all of the stamps I seem to be collecting as collectors items. xo

Monday 8 September 2014

Isla Mae

Who agrees, that's a gorgeous name?! Love it!! 

I created this card using a Hobby House topper for a brand new baby girl, Isla Mae.

I haven't had as much time as I might have liked to really make head way with my Christmas cards so far this year. I know I said a couple weeks ago my blog might be Christmas-y from here on out, I lied. I've been sooo busy with commissions and other DT work that I haven't really had time. This must change! Anywho.

Isla Mae.


I was desperate to use that feather paper from Carta Bella, and this was the perfect project for it! The perfect colour pink! Yum! I teamed it up with some green plaid paper from an Echo Park pack. It's not very often that I mix and match papers from different packs, but this time it totally worked! :)

I added a whole load of the usual froofroo. Any questions, don't be shy - just leave me a comment and I'll get back to you ASAP. Thanks for stopping by. xo

Sunday 7 September 2014

The Yeti and the Snowman

I went all out and had some me time at the craft desk yesterday afternoon! Did I really have time for it? Probably not! Did I enjoy every moment?! Definitely!

Sometimes I forget what got me started on this little card making journey of mine. I get all wrapped up with DT work (which I thoroughly enjoy, else I wouldn't do it) or with commissions (sometimes working to a particular specification can become a little tedious after a while) that I often don't have time to do just what I want to do.

Yesterday afternoon, that all changed. I decided I wanted to play with my little Distress Inks, create a background and add some cute Christmas characters to them for some little notecards.

Here's what I did!


For the snowman card I began by inking up some Neenah cardstock with Mustard Seed, Peacock Feathers and Tumbled Glass Distress Inks to create an Aurora Borealis look to the sky (the Mustard Seed and Peacock Feathers make the most delicious green). I then added some white embossing paste through a stencil and added fineee, fineee glitter to the snowflakes before the embossing paste dried (hard to see the glitter in the pictures but it's a really lovely effect IRL.

Funny story. The glitter I used was so fine it was like dust and it was lingering in the air once I had flicked the excess from the card. It was lingering in the air so much so, that when I went to blow my nose.. my snot was glittery. I kid you not! 


Then for the next step I stamped, coloured, paper pieced and 3D'd up my little snowman from Paper Smooches - Freezy Fellas. I coloured him with my Cool Greys and some oranges for his nose, and then went to town with my patterned papers for his hat, scarf and buttons. I used patterns from Echo Park Winter Wishes pack. I used a sentiment from the Freezy Fellas set which I also stamped onto some more patterned paper and added to the night sky.

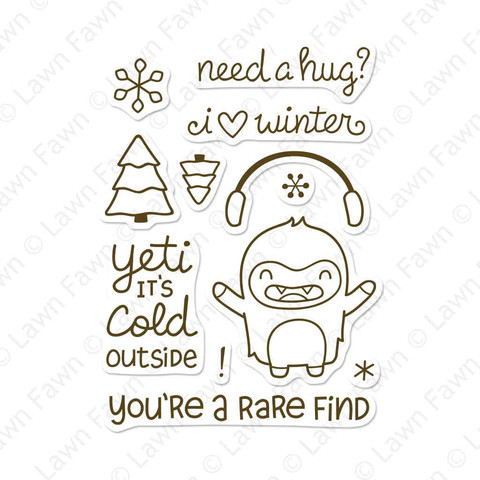
As for those little trees, I used the Yeti, Set, Go set from Lawn Fawn which has only recently come out and I am in LOVE with it!!

Yeti Set GoYeti, Set, Go Lawn Cuts

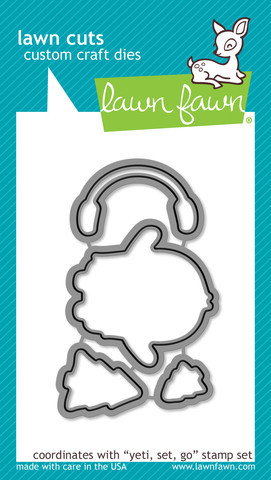
I also used the same set with the coordinating dies for my next card.


This time I began by stamping the snowflakes from the Yeti, Set Go set onto my Neenah cardstock before adding some Violet Pearl embossing powder (again, another detail that my crap photography fails to pick up) over the top and heat setting. I then went in with the same three colours of Distress Ink as before but went over the Mustard Seed with the Peacock Feathers multiple times to get that wonderful green colour just above my hills.

I stamped, coloured, paper pieced and 3D'd my little yeti (LOVE him) before adding him to the little scene with the hills (I inked the edges of those with Tumbled Glass DI) and trees from the set.

I stamped a sentiment from the set onto some more Echo Park patterned paper before adhering everything down with dimensionals and silicone glue. 

Ahhh. :)

Two little notecards, perfect for Christmas which I thoroughly enjoyed making with no restraints to work to. Wonderful.

Thank you for looking. xo

Search My Blog

My Fellow Craft-o-Holic Followers

Total Pageviews